Thursday 28 July 2011

Working with Plastic Card

"Can you tell what it is yet?" A change from my usual posts - this one is more images and less words.

Construction material;
3mm and 5mm Plastic card (the sort that FOR SALE signs are made from) and superglue.

I hope that you like it.


In part two I will describe how I based and painted this simple model.

Tony

Wednesday 27 July 2011

Working with foam - part five

Even though I had felt the board was finished I have added three half buried blue foam rocks to the sides of the board. In normal circumstances I would have chosen to have stuck down three actual stones (from the garden) with a hot glue gun. However, I felt that this would have been against the theme of these posts - detailing as they do 'working with foam.'

I decided to use blue foam. Some foam off-cuts were roughly cut to shape with a large 'snap-off' bladed knife and then sanded smooth, before having a stone impressed into the foam. Once I was happy with the shape and texture the foam rocks were stuck down and the groundwork blended-in with DAS modelling clay.

Photo One - Here you see the blue foam rocks added but still awaiting 'full' texturing.

Photo Two - In this image you can see how the blue foam has been further textured and 'bedded-in' with DAS.

In addition I added a small resin casting of Greek urns to the front right of the board. Once again, I used DAS to 'bed-in' this piece.

Photo Three - Shows the resin urns and (in the background) the foam rocks.

Photo Four - I used some spare craft paint and a large stiff brush to paint the first and basecoat colour.

Photo Five - The first of the many highlights or drybrushed layers.

Photo Six - More highlighting.

Photo Seven - The final highlight of pure tube acrylic Titanium White drybrushed over the very highest points. I have also finished off the well/fountain by painting the standing water first Midnight Blue then Royal Blue. the fountain head has been painted Scorched Brown, then highlighted in GW Metallic paints.

Photo Eight - I have 'washed the main stone and rock areas with a 'dirty black/brown wash' and highlighted the extreme edges of the stone blocks and well with Titanium White.

The board edges were painted Chaos Black and the whole piece was then painted with galleria Acrylic Matt varnish. While the varnish was still wet I sprinkled some fine sand over the groundwork in an attempt to add both 'colour' and texture.

Finally I have added a variety of static grass and tufts to the groundwork.

Photo Nine - A picture of the finished board decorated with some of my 40mm Ancient Greek/Greek Mythology miniatures to give an idea of the size of this display piece. The board is 340mm x 340mm.

Photo Ten - A close-up of the well/fountain.

I hope you have enjoyed this short tutorial as much as I enjoyed building it. In addition I am pleased that I have been able to demonstrate some of the techniques that I regularly use when working with foam.

The simple and small blue foam well or fountain grew into this display piece which I now plan on using as a backdrop when I photograph my 40mm Greek figures.

Tony

Monday 25 July 2011

Working with foam - part four

With the well, paved base and carved wall finished I looked around for a suitable backdrop. I had thought about building it into a foam hill, but this would have made it huge! Searching my garage I came across a small resin base, 35cms x 35cms which I picked up some time ago. I have no idea what it was originally used for but I would guess that it was some sort of desk top or counter top display.

I mounted the well onto a rough slab of cardboard and built up the rock face with broken portions of White packing-case Foam. I used a hot glue gun and some cocktail sticks to reinforce the joints.

Photos One and Two - The foam rock-face finished. I mounted the well at a slight angle, thinking that it would look more natural, however I now think that it might have 'sat' better if mounted in line with the base edge. It took about 20 minutes to complete.


Photo Three - Using what I had readily available, I covered the rock-face with kitchen towels laid over uPVA glue and then built up with more kitchen towels and uPVA glue in a paper-mache mix. The kitchen towels have a very distinct texture when built up in this way - one that mimics rock very well.

The gaps and detail sculpting was built up with some Terracotta DAS modelling clay which I had left over from a previous project.

Photo Four - In this image you should be able to get a better idea of the size of this model.

Photo Five - With the bulk of the groundwork now completed - the base is looking like a large piece of terrain or diorama. I have decided that I will use it as a 'back drop' for when I take photos of my finished Typhon project miniatures, It's too big to be used as a piece of stand-alone terrain, and too small to be used as a gaming board. However I am happy with it.

The groundwork and rock texturing has been built up with ready mixed filler, some white DAS, sand and sieved stones applied over uPVA glue.

Followers will know that this started out as a simple (small) well and as you can see is now a large display piece. It was never planned to be like this - it just grew.

In the next instalment I will give details of the painting and finishing.

Tony

Friday 22 July 2011

Working with foam - part three

In part two I teased you with a single sketch and told you something of the background to the construction of this simple piece of Typhon themed terrain. Here I will show you photos of the stages of development this piece went through.

The well/fountain was constructed out of strips of Blue Foam, cut from a larger block with a 18mm 'snap-off' bladed craft knife (always try to fit a new blade before working with foam - it makes life so much easier) . Construction was completed with uPVA glue and strengthened with steel pins.

The sequence of building was; The basic trough, the three pieces were glued together and pinned before a base (water level) was added. The bottom of the back wall piece was cut out and the two small pillars added, later two additional decorative top pieces were stuck on. The plinth stone (the one with the Greek writing) was added and then the triangular roof shape was glued on to the plinth. Next, I built up the top of the roof section and finally added the decoration to the upper section. The decoration are two small squares of thin blue foam and a plastic disc cut from a Games Workshop tank wheel.

Once the basic construction was glued and pinned, I added some DAS Modelling clay to 'blend-in' the separate foam pieces and sanded the edges to be more irregular and worn. I have also impressed a rough stone into the Blue Foam to add some additional texture.

Photos One and Two - The basic and finished well. Which at this stage stands 60mm wide, 65mm tall and 40mm deep.


Photos Three and Four - Not content, I have added a paved floor to the well. This was built from some White Foam, actually the foam used as a base for frozen Pizza.

I cut the paving with a scalpel and then ran a pencil into the lines to accentuate them. Finally I have impressed a rough stone onto/into the foam to add texture. The base paving is 125mm wide x 75mm deep.

In these photos, you should also be able to see additional filling with DAS and some basic texturing - this time done with Artists modelling paste, which is used to thicken or add texture to standard acrylic paints. Remember that you can always 'click' on the images to see more.


Photos Five and Six - I felt that a well/fountain needed a back-drop and so I built this small section of stone wall. The wall is a piece of 8mm thick Blue Foam and the stone blocks are first cut into the foam with a scalpel and then enlarged with a pencil, once again I have used a stone to impress texture. I have also opened up some of the joints with a 'spear-tip shaped' sculpting tool.

The wall is glued and pinned to the well and the gaps filled with DAS Modelling Clay. The wall is 85mm tall x 130mm wide.


Hopefully you can see the construction steps and how this simple piece of terrain has grown! In part four - yes there is more, much more. I will show you how this small piece of terrain grew and grew.

Should anyone have any questions, you know how to contact me.

Tony

Wednesday 20 July 2011

Working with foam - part two

If ever there was a post that highlights just how hap-hazard I am when it comes to modelling - then this is it!

As regular readers will know; I am a frustrated terrain builder, held back by never having enough room and too many ideas or projects. The Typhon or Ancient Greek/Greek Mythology project is a case in point. Now that I have a couple of figures I have been looking around for a sand coloured gaming board. Earlier this week I saw just the board a 4ft x 4ft table (ex-Ikea I think) for sale for just £5.00. Unfortunately my Wife was with me and even as I was checking the table out, I heard comments like "don't you dare" and "where are you going to put it!"

Back home, even more frustrated at missing out on such a bargain, I thought I would start on a small project a well, a Greek well or fountain similar to the one seen on the El Viejo Dragon site, see V43.11. I sketched this and set about building this simple and small terrain piece (remember the word 'small') out of scrap foam. This is where the whole project came unstuck and a simple sprint turned into a marathon - well at least a 15,000 mtrs.

Seriously, you just have to follow how this modelling project developed and turned into..... Well that would be telling. My next post will give more details, until then.....

Tony

Tuesday 19 July 2011

Goblin Squig Hopper

Earlier today my Daughter was clearing out her cupboards and came across this Games Workshop Goblin Squg Hopper which I modelled and painted for her some time ago. The metal miniature is mounted on to the barrel of a Biro ball point and was used by her as a note taking pen during her school and university days.

It is gloss varnished, but has no matt varnish and currently sits beside the computer and will now be used by me to make notes.

A little bit of fun - I hope that you like it.

Tony

Sunday 17 July 2011

40mm Amazon

The latest addition to my 40mm Ancient Greek/Greek Mythology Project is this 40mm Greek Amazon. The miniature is a two part casting (main body and left arm/shield) from the El Viejo Dragon or EVD range. For more details see this link

The miniature is 40mm tall and is mounted on to an old fashioned 1d coin (pre decimalisation) with the groundwork built up from Milliput and textured with some sieved sand.

Photo One - The finished miniature.

Photo Two - The bare mini is sculpted with loads of fine detail but is a little too thin or slight. I have therefore built up the arms legs and bottom with some acrylic modelling past (the sort that is used to thicken paint).

Photo Three - As above.

Photo Four - The finished miniature from a different angle and showing the hand-painted shield design which was inspired by an illustration in the Wargames Foundry Compendium.

Photo Five - As above.

This was an exercise in painting subtle flesh tones and one that I am not entirely satisfied with. I have a couple more similar figures that I will be painting soon.

Tony

Saturday 16 July 2011

Working with foam

As an avid model maker, particularly building wargame terrain I have a huge store of construction materials that many might find a little excessive. However this week I was given a couple of pieces of foam that at first glance looked perfect for building wargame terrain, particularly stone or brick built buildings.

While sorting out my shed-at-the-bottom-of-the-garden I thought that I would try to identify some of the many foam and resin modelling materials that I regularly use;

Photo One - White or Standard Polystyrene foam. These two examples are a thin base from a frozen pizza and a block from a packing case that I use as a 'third-hand' to hold modelling or painted figures on cocktail sticks.

Pro; Easy to obtain and comes in many intriguing shapes and firmness.

Cons; Soft and easily damaged. Does not hold carved or impressed detail well. Difficult to glue, so use either cocktail sticks or pins to strengthen uPVA bonds.

Photo Two; Pink Foam. Used in the building trade for sound proofing and insulation. This example is from a building site skip.

Pros; Lightweight and has a more even texture (no beads or bubbles) can be carved, indented and sanded.

Cons; Once again, easily damaged and has a tendency to crumble. Difficult to glue (as above).

Photo Three; Blue Foam. Used in the building industry and comes in a variety of different thickness. This particular image shows 20mm, 30mm and 8mm thickness.

Pros; Much firmer that the previous two, can be carved, indented, sanded and shaped easily. It will also hold these details better. One tip I will pass on is that you can press a rough stone into Blue Foam and it will preserve the stone texture perfectly.

Cons; Still easily damaged, but you have to be very 'ham-fisted' to destroy detail. Try gluing with a hot-glue gun, but still strengthen joins with cocktail sticks, pins or even bamboo skewers.

Photo Four; Green Foam. This is a new product to me and the one that prompted this short article being given to me this week. It is much finer than Blue Foam is slightly firmer and has a powdery texture.

Pros; Still to be defined, but tests look promising. I would expect it to hold carved detail much better than Blue Foam.

Cons; Unknown at this moment.

Photo Five; Soft Resin. Not really apparent from the photo, but this is more like soft resin, than foam. I have no idea what it is supposed to be used for but it can be cut, carved and sanded easily - it does not take pressed detail as well as blue foam.

Pros; Much firmer than foam, can be cut with a knife rather than a saw.

Cons; Too firm to have detail pressed into it and therefore all detail has to be carved into it.

Photo Six; Soft Resin 2. This is a brittle resin slab, sorry cannot find a name for it. I have used it to make individual stones or bricks, can be sanded and is much firmer than foam.

Pros; Firmer than foam, can be carved and sanded easily and glued with superglue.

Cons; So far I have not been able to obtain any big sheets, mainly small off-cuts from a recycling centre.
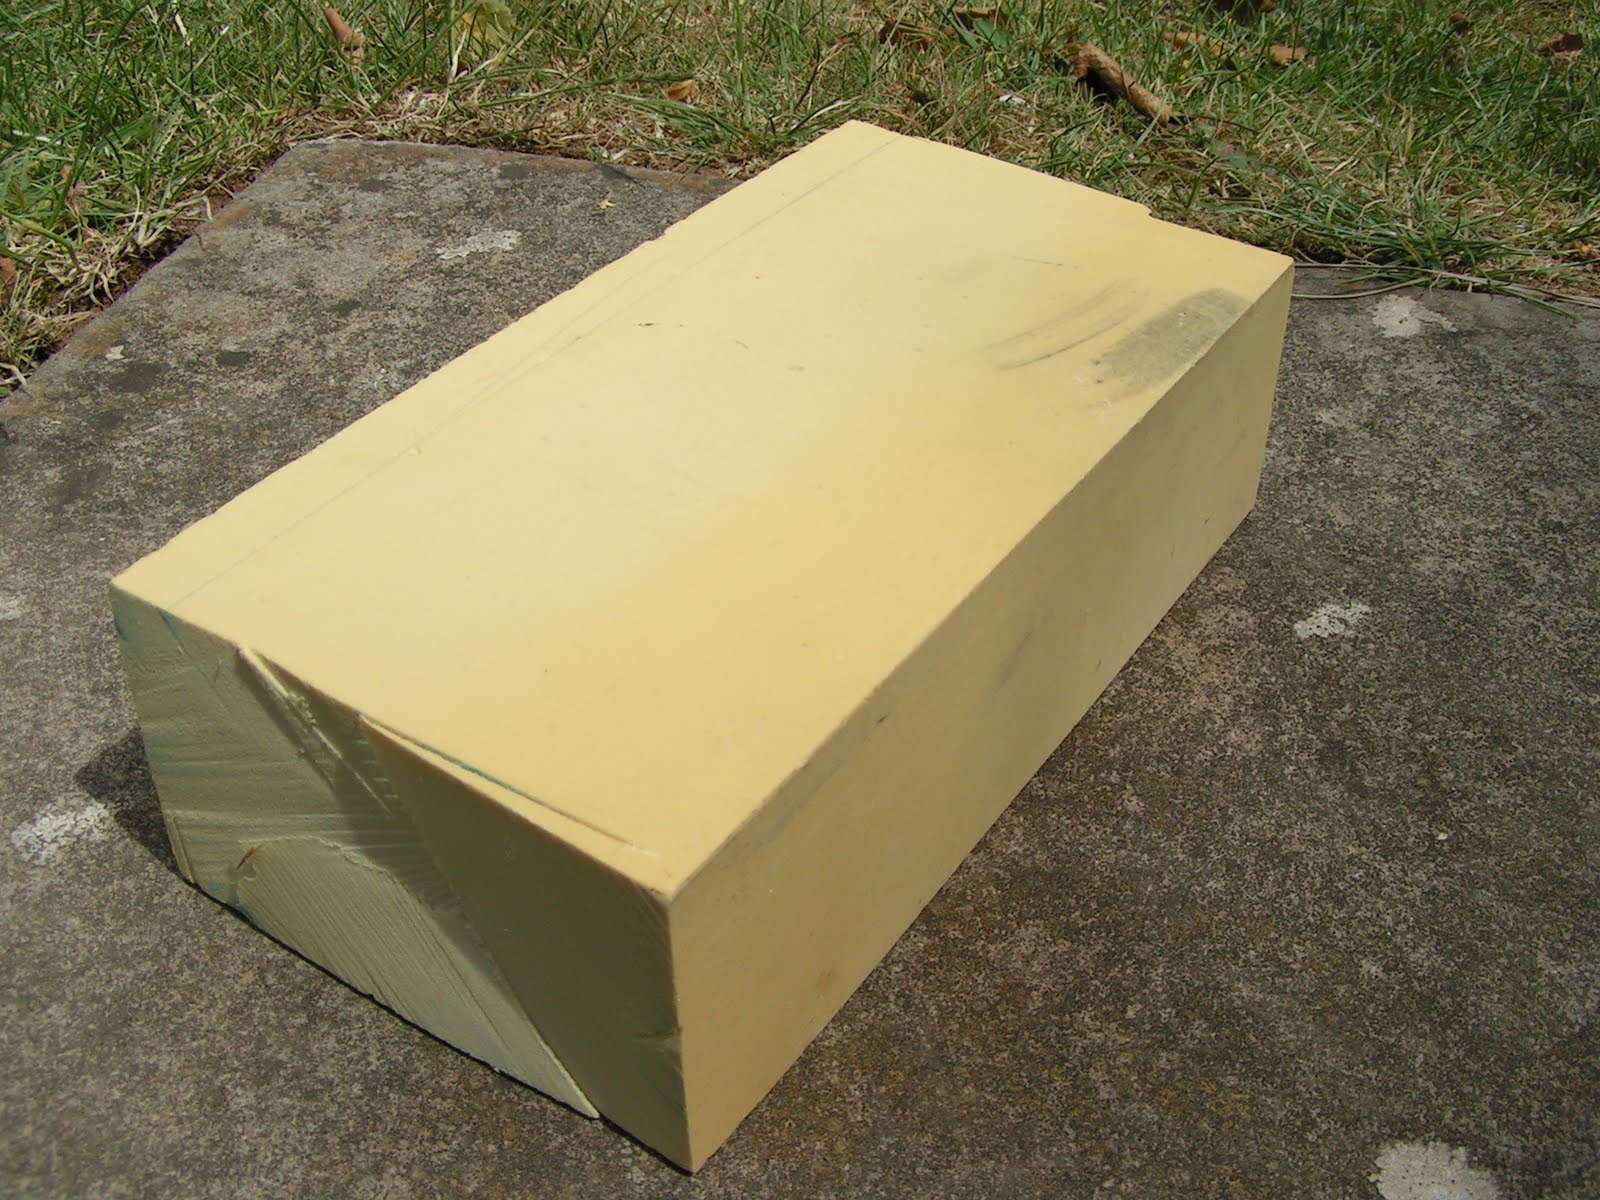
Photo Seven; Balsa Foam. I was given this block by a technical teacher from a local school. It is used for student projects and is available for artists and technical artists to build props. I use it very sparingly as it is the only block I have.

Pros; Easily cut, carved and sanded. Can be glued with suerglue and is the basis of many modelling projects.

Cons; I don't have that much, although I believe that a similar product is available via e-bay.

Photo Eight; Hard Resin blocks. I have a few, they are very heavy and much more difficult to cut, needing a hacksaw. It can be sanded, but must be dangerous as there will be dust.

Pros; Very robust - there are different grades and strengths. Ideal where you need strength.

Cons; Not sure of the health risks connected with this one and as such is not usually my first choice of modelling material.


As stated above these are some of the wide variety of materials I use for modelling. They range from common to very rare and serve different needs. I welcome any comments relating to their names and 'official uses'.

I hope that this summary helps.

Tony