Tuesday, 29 August 2017

An Industrial Narrow Gauge Adventure - test #6 The Feldbahn Locomotive


Part One - The construction.

I choose this Feldbahn (narrow gauge railway engine) as my first 'scratch-built' engine. It is based on an image that I found on the PHB BB Creative Community site for full details see this post.

Image Two - The original works drawings were used to produce my own 11mm = 1 foot scale drawings. These drawings are also available on various Pinterest pages.


Image Three - I find it easier to produce these drawings on grid paper, first sketching the model in pencil and then confirming the dimensions with a 0.3mm drawing pen.


Image Four - My first try was not a great success.....


Image Five - But the second attempt was much better. The model is based on a simple Hornby 'Smokey Joe' 0-4-0 chassis.


Image Six - The old and the new alongside one another.


Image Seven - There are one or two modifications to the original design. I added an exhaust (for the paraffin starting engine), a tool box on the bonnet and kept a round view window to the rear. After all this would have been a much modified and long-lived workhorse.


Image Eight - The yellow detailing is 'sticky-back' plastic.


Image Nine and Ten - More detailing. The handles are thin, bent aluminium superglued in place. The buffers or coupling housings are multiple layers of plastic card with a paperclip hook and the headlight was 'scrounged' from a 1/50th scale Corgi truck.


Image Eleven to Fourteen - The roof was constructed from more aluminium sheet curved over the side of a glass jar and detailed with more sticky-back plastic. Most of the upper bonnet detailing was guessed at.


Image Fifteen - With construction finished, I have placed the un-painted model on the section of test track, seen in this earlier post.


The Feldbahn engine is 120mm long (over buffers) x 38mm wide (at the widest point) and 73mm tall (over cab).

The bulk of the construction is white 30thou plastic card (about 1mm thick).

It is built to the scale of 1:27.7 or 11mm = 1 foot so that 16.5mm Peco 'Crazy Track' represents an 18 inch gauge industrial railway. The original Feldbahn engine used as inspiration ran on 500mm gauge track.

For more details of the Narrow Gauge Adventure go to this label.

Tony

Saturday, 26 August 2017

Pugs in Tricornes new from AA


This week I received an e-mail notification from Alternative Armies giving details of their most recent Flintloque release - The Von Mohnblume Line or cute little Pugs in Tricornes. The metal miniatures designed and sculpted by Rob Alderman of Hysterical Games were just what the doctor ordered and I have promptly ordered a set of ten Pugs on the pre-release deal, details of which can be found here.

For anyone who knows Rob and Hannah, the choice of Pugs should come as no surprise and Rob assures me that at least on of the miniatures will be wearing an eyepatch. Poppy celebrated in pewter.....

Well done Gavin - a great choice of character unit for Flintloque and with other earlier tricorne wearing figures, a possible sub-genre for gamers to enjoy.

I'll be basing and painting the miniatures as my 'On-Line Build' for September so stay tuned for updates.

Tony

Thursday, 24 August 2017

Maigret Night at the Crossroads


An illustration from the Dominic Hyman web page - used without permission.

Last night Sue and I were searching through the 'Black Box' for something to watch and came across a recording from much earlier this year. Maigret - Night at the Crossroads with Rowan Atkinson as Maigret. We both enjoyed the performance but for me it was the authentic setting and superb props that were the highlight for me.

With sketch book in hand, I made many quick pencil sketches of the garage and forecourt. Then this morning while searching Maigret and Night at the Crossroads on the internet I came across this link which is just full of detailed set layouts and props. I have saved the link and expect it to be the basis of many future modelling projects.

I would expect the plans and illustrations to be of use to many period modellers and if you have a high quality printer, the ready made road signs and advertising plaques could prove a boon.

Check out the other projects here - I particularly like the detailed elevations.

Tony

Wednesday, 23 August 2017

An Industrial Narrow Gauge Adventure - test #5


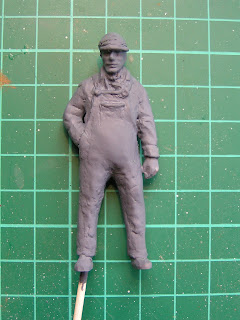
My latest 1:27.7 scale figure The Foreman. The character is based on Ronnie Barker in Open all Hours and converted/modified from a 1:24th scale figure bought from e-bay.

Image Two - The two figures next to one another, the new sculpt and the source.


Image Three - After coating the whole miniature with GW liquid green stuff, to smooth-out the clumsy sculpting, I basecoated the figure with Stonewall Grey from Vallejo. Harry stands 63mm tall.


Image Four - Tom, Dick and Harry. The first three 1:27.7 scale (or 11mm = 1 foot) test pieces.


I have commissioned Rob Alderman of Hysterical Games to cast these three figures in resin. my intention is to modify them and paint them as characters on my planned Industrial Narrow Gauge layout. Details to follow.

Should anyone be interested in purchasing a set of these or the planned additions, please contact me on dampfpanzerwagon@yahoo.co.uk

More to follow.....

Tony

Monday, 21 August 2017

Ford's Hospital, Coventry


Earlier today, Sue and I visited Coventry City Centre with Holly. While I was waiting for them to finish shopping I started exploring some of the many side-streets and came across this interesting building - Ford's Hospital a 16th Century half timbered building that was used as an Alms House and was later re-built using original timbers after the original was destroyed in the Blitz of 1940. For more details see this Wikipedia link.


Tony

Saturday, 19 August 2017

An Industrial Narrow Gauge Adventure - test #4


The second sculpt - another figure or workman in dungarees.

Image One - The figure was converted from another 1/24th scale plastic figure bought from e-bay. Here you see the finished sculpt alongside the original donor figure.


Image Three - After smoothing out the Green Stuff and Milliput, I painted the figure with some GW liquid Green Stuff before undercoating with grey acrylic paint.


Image Four - The flesh areas were built up over Snakebite Leather.


Image Five - The white shirt was painted over Stonewall Grey from Vallejo, then highlighted with Dead White.


Image Six - The workman from the rear showing how the work clothes were sculpted.


Image Seven - The first and second test figures alongside one another. They stand between 63mm and 65mm tall or around 5' 8'' - 5' 10'' in 1:27.7 (11mm = 1 foot).


I have to admit that sculpting these test figures is very therapeutic. I would expect to do more, many more.....

Tony

Thursday, 17 August 2017

Printable Scale Rule


The 1:27.7 Narrow Gauge Adventure continues. However it was a thread over on The Lead Adventure Forum that was the impetus for this latest post. I saw the post which gave details of a site that allowed you to download scale rulers in any scale. I though I'd give it a go and here you see the result. A scale ruler marked off in 10 cms increments and the latest scratch built figure - a driver (more on this in a later post).

I printed off two scale rulers, both to 1:27.7 scale and then had them laminated and trimmed. For details of the scale rulers, see this link.


I can see this simple tool being useful in this and future modelling projects.

Tony

Tuesday, 15 August 2017

Julius Caesar at the RSC


Sue and I were treated to a very special treat yesterday, Holly had bought tickets to see a performance of Julius Caesar at the RSC, Stratford-upon-Avon. In addition we had a complimentary pre-performance tour and at the end of the second act we were invited to a question and answer seminar with the director and cast.

The performance was a very special and one-off integrated British Sign language performance where the signer is not off to one side (as is usual) but integrated into the cast and playing alongside the actors. As one member of the audience commented "it was like seeing the actors soul."

A very special treat and quite a different experience from the last time I saw Julius Caesar at the RSC, back in 1995 when I was invited to attend as a guest of Courvousier Cognac.

Tony

Note;
Sue and Holy are both experienced signers and currently awaiting their BSL Level 3 results.

Update;
Both Sue and Holly have passed their BSL level 3 exam - CONGRATULATION.....

Monday, 14 August 2017

Pen & Sword Commission


In 2016 I was approached by Pen & Sword to produce a book (actually two books) on building wargame terrain. The first of these books themed around the Napoleonic Wars has now been sent to the commissioning editor for checking and I am awaiting further details on editing and production.

Once I have more information and clearance, I will post further details.

In the mean time copies of two of my self-published books; Dampfpanzerwagon Guide No. 2 - More Wargame Terrain and Dampfpanzerwagon Guide No. 3 - Models For Wargamers are still available for details of how to order copies please go to this link or this link.

Dampfpanzerwagon Guide No 1 - Building Wargame Terrain is unfortunately out of stock and out of production.

Thank you.

Tony

Friday, 11 August 2017

An Industrial Narrow Gauge Adventure - the Gauge/Scale thing.....


I keep getting questioned on why I am working in the obscure scale of 1:27.7. I though I would try to explain.....

Gauge is the distance between the rails, for example 2 foot or 600mm

HO-OO track is 16.5mm and Peco offer a track called Crazy Track which is modelled to look like narrow gauge track - for details see this link.

I wanted to model an 18 inch gauge prototype so 16.5mm would equate to 11mm = 1 foot or 1:27.7

Here are some examples of other modelling Gauge/Scale combinations;

Name                       Gauge                   Scale  
G                              45mm                   15mm = 1 foot
GN15                       16.5mm                15mm = 1 foot
SM32                       32mm                  16mm = 1 foot
O-16.5                     16.5mm                7mm = 1 foot
ON9                         9mm                     7mm = 1 foot
HOm                        12mm                   3.5mm = 1 foot
HOe                          9mm                    3.5mm = 1 foot
009                           9mm                     4mm = 1 foot
N-6.5                        6.5mm                  2mm = 1 foot

27.7N16.5                16.5mm                11mm = 1 foot

Tony

Others include;
S                                16.5mm                 1/64th scale
5.5N16.5                   16.5mm                1/50th
ON30                        16.5mm                1/4 inch = 1 foot
3/8th (1:32nd)        16.5mm                3/8th = 1 foot

There are many more.....

Tuesday, 8 August 2017

An Industrial Narrow Gauge Adventure - test #3


The latest test, a 1:27.7 scale (or 11mm = 1) foot narrow gauge railway skip shown alongside the custom built and painted workman - see earlier posts for more details.

Image Two - The scratch built skip made from a HO-OO brake van chassis/frame and some spare plastic card.


Image Three - The second-hand Piko brake van picked up from Tennants Trains for just 50p. I bought two, so expect a second model soon.


Image Four - The red skip body is from a Gnomy toy train set that I had in my spares box. The ends have been modified to sit on the plastic card frame but otherwise it is stock. The skip has been modelled so that it remains horizontal in transit, but can tilt on the frame if needed. Yes the skip actually works.


Image Five - The painted skip on the piece of test track which has featured in earlier posts.


The rather unusual scale of 1:27.7 or 11mm = 1 foot represents an 18 inch gauge industrial track layout using 16.5mm Peco Crazy Track more often used for O-16.5 or 7mm = 1 foot narrow gauge.

I can confirm that these simple tests are satisfying my Narrow Gauge modelling itch..... Expect more updates soon.

Tony

Sunday, 6 August 2017

Isle of Lewis Chessmen Statues - part three


The third Isle of Lewis Chessman, this time the Rook or as I have seen him described on some Web pages - The Beserker.

Image Two and Three - Show the bare plaster cast on an oval of 3mm thick plastic card with the groundwork built up from DAS modelling clay. The groundwork was further textured with sieved stones and sand which was applied over uPVA glue.

The two images show some of the holes and cast bubbles filled in with more DAS.


Image Four - The painting followed the same pattern as the two earlier statues.


Image Five - Showing all three Isle of Lewis Statues together with a Flintloque RifleOrc which is shown for scale.


I have mentioned on earlier posts, how much fun these simple statues were to model. I should also say that they were a very easy project to work on.

Tony

Friday, 4 August 2017

Isle of Lewis Chessmen Statues - part two


The King was next.....

I knocked off his head as the original plaster cast head was so badly cast I didn't think it was worth saving. Here you can see the King and Queen with a Flintloque RifleOrc shown for scale and how the two statues have slightly different stone colours, the King being a little lighter.


Image Three - Just like the Queen, the King was mounted on to an oval of 3mm thick plastic card and the groundwork built up with DAS modelling clay. This groundwork was further textured and detailed with sieved stones and sand over uPVA glue.

It may not be apparent in these images, but there has been a considerable amount of repairs done to the original chess piece. These were modelled with DAS over uPVA glue.


Image Four and Five - The base colours were 'slapped' on in the same way as the Queen then washed with all sorts of different coloured and strengths of washes trying to keep the darker colours to the bottom and the lighter ones to the top. The green mould was a watered-down acrylic paint applied as a wash.


Image Six - The base and groundwork were painted in the usual Snakebite Leather colours, although in this case, the Snakebite colour was made up as I have now come to the end of my GW Snakebite Leather supplies.....


Image Seven and Eight - The model was varnished with Galleria Matt Varnish before the base was decorated with dyed sawdust and ground foam.


Once again, the damaged chess pieces have come out fine and considering they were about to be thrown away, I think they look great as Flintloque scale statues.

Tony