Sunday 30 April 2023

Cyclops update - finished

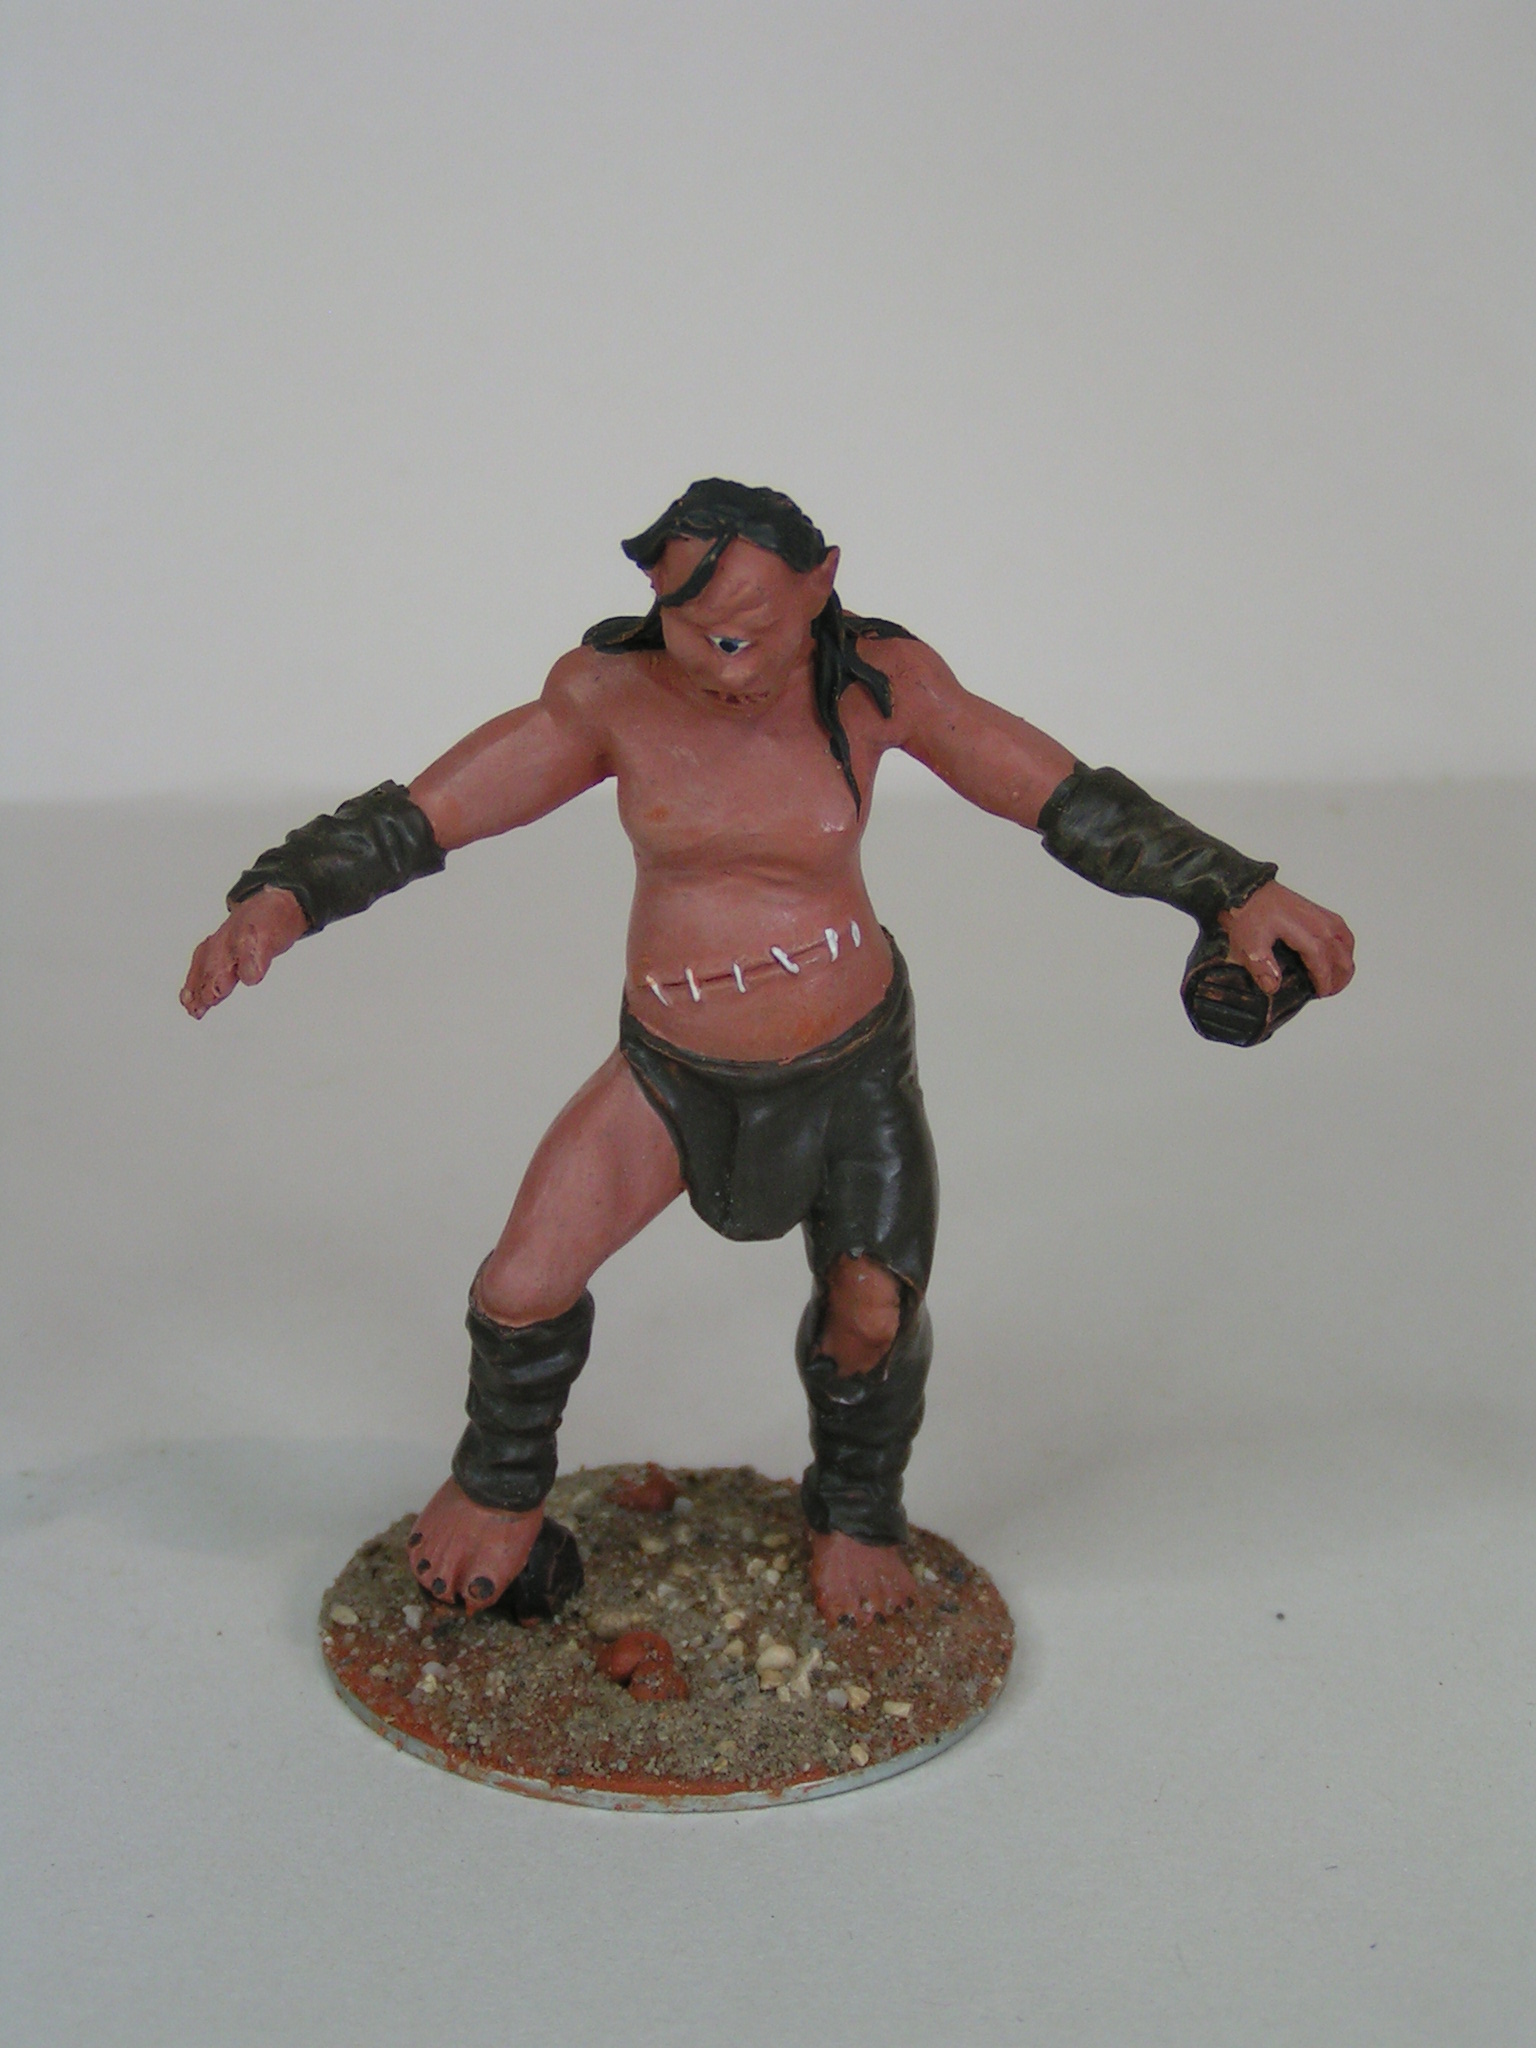
The Del Prado Cyclops all varnished, based and finished. The model was bought in Italy, when on a short city break to Lucca and cost just 5 Euros. I've re-based and re-painted the miniature as well as doing some remedial sculpting, adding skulls and general tidying up. the Cyclops is just over 80mm tall and will be a great addition to my Typhon or Greek mythology collection of 40mm Hoplites that I have been collecting for some years. For more information, see the Typhon label.

The final image shows the painted Cyclops alongside one of the 40mm Miniatures from the out of production range once sold by Spartan Games. I am very pleased with the 'sickly' purple and blotchy skin tones, something that sets this model apart from my otherwise 'clean' Typhon figures.


I am now looking through my 'lead mountain' for suitable minis I can add to this project and will keep the Blog updated with any developments.

Tony

Friday 28 April 2023

Cyclops update - part five


The leather areas were painted in a rich red leather colour with pale or even white fur trim and the skulls were painted in a pale skeleton colour. the hair was picked out in a very dark brown, almost black colour.

The groundwork has been painted in my usual Typhon base colour - a very pale cream highlighted with white with odd stones picked out in grey highlighted white and then given a light wash.

I have used a number of light washes to add depth to the skin and leather areas before varnishing with Galleria mat varnish and gloss varnish for the eye.

I just need to add decoration to the base and this Cyclops is finished.

Tony

Wednesday 26 April 2023

Cyclops update - part four

The latest update shows the painted skin colour - I was looking for an insipid, unhealthy skin colour and went for this pale purple colouring. The inspiration came from an image I found on the internet - see below and was built up in layers and using thin washes.

The last image shows the rear of the partially painted Cyclops. I used a stippling technique to show skin mottling. 


Hopefully, I can get some more painting done today.

Tony

Monday 24 April 2023

Cyclops update - part three


I have basecoated the whole model with a dark brown/black mix and added some zenithal highlighting by using a lighter brown across the upper surfaces before 'washing' the miniature with a dark brown wash. In the past I would have used a black basecoat, but recently I have found that I prefer a dark brown base to build up my painting.

The next step will be the flesh areas and I have been searching the internet for inspiration.

Tony

Friday 21 April 2023

Cyclops update

The Cyclops was mounted on to a 50mm metal washer (may last one - I will have to pick some up the next time I'm shopping) and the groundwork was built up with terracotta Milliput. Sieved stones and sand was then added over PVA glue and sealed with a mix of diluted PVA to which I have added some washing up liquid.

I thought the toy sculpt was a little lacking in features so added a couple of plastic skulls and built up the fur with green stuff following an illustration I found on the internet.


My next step will be to undercoat the model and I'm also looking at more illustrations to help me decide on the flesh colour - the flesh on this simple paint scheme looks to artificial - I want a more putrid flesh colour.

Expect more updates soon.

Tony

Wednesday 19 April 2023

Another Cyclops for my 40mm Typhon Project

On a recent City Break holiday to Lucca, Italy I picked up this toy Cyclops. The model is from the Del Prado range of Greek Mythology figures and to the best of my knowledge has never been released in the UK. The monster stands just over 80mm tall and as such will be perfect to fight against my 40mm Spartan or Hoplite figures which I use in my games of Typhon (from Alternative Armies). The Cyclops cost just 5 Euros which I thought was a real bargain.

The resin or strong plastic Cyclops was mounted on a metal oval base, but when I tried to saw the base off, it fell away (as can be seen in the above image). The paint scheme is pretty basic and my plan is to re-mount the monster on to a round washer base and paint the figure in a more realistic colour scheme.

The final image shows the Cyclops alongside on of my 40mm Hoplites and a bottle of Army Painter Quickshade shown for scale comparison.


I'll try to post regular updates showing both work-in-progress and my chosen colour scheme.

Tony

Monday 17 April 2023

A lucky magazine find

This issue of Narrow Gauge & Industrial Railway Modelling Review was picked up in a second hand store for just 50p. The reason it was so cheap is that the cover has become loose, but the magazine contents were all in good order and I'm sure I can repair the damage.


A second hand issue No. 55 would normally go for around £5.00 - if you could find it as the magazine is rarely found on e-bay.

The contents were a great read while flying to Pisa, Italy on a short city-break holiday.

Tony

Sunday 16 April 2023

The Spanish Aeronef - Miniature Wargames issue 481

Issue 481 of Miniature Wargames ((May 2023) features an article written by me showing how I scratch built this Spanish Aeronef for use in my re-imagined Battle of Lepanto using huge steam driven, lighter than air Skyships to re-fight this encounter in a Victorian Science Fiction 'What-if'.

The model used the drop tank from a 1/32nd scale Tornado fighter jet and loads of scrap plastic to built a steam driven Aeronef. The model was painted with standard acrylics and mounted on to a scratch built flying base.

The image above shows the Spanish Skyship alongside one of my Ottoman Empire Dirigibles (or Digs). Full details can be found in the magazine or by searching MW issue 481. Or click here.

Tony

Monday 10 April 2023

The Machinists Tool Chest - part two

Following on from my earlier post (see this link) I spent the weekend cataloguing and cleaning the contents. The first image shows lathe drills (they have a different tapered shaft from normal drill bits). As you can see I have quite the collection and after cleaning they all look to be in perfect condition. Any standard drill bits were cleaned and added to my tool box.

Image two shows more lathe tools, this time cutting bits. I had quite a few more but here is a selection of the bits, the larger ones were much longer and covered with a protective copper coating.

Image three shows a selection of spanners, the large SNAIL BRAND spanner is over 8 inches long and very heavy. It was marked a 1930's date and there were also military markings on some of the others.

Here you can see the SNAIL BRAND markings and a second with ABINGDON stamped on the shaft. All of the spanners (and rulers are Imperial, with no Metric markings at all).

These tiny spanners are just over 1 inch long and both had military markings from the 1950's.


The final image shows a spanner multi-tool which after cleaning up and oiling works perfectly.

There are lots more tools that need sorting and cleaning (I'm going for a cleaned up look rather than a full 'gleaming' restoration) and I will give more details as and when I get around to it. The Machinists Chest will need quite a bit of restoration and a new front, so will take a little longer.

The Machinists Chest - the gift that just keeps giving.....

Tony

Sunday 9 April 2023

Flintloque/Silver Bayonet cross over - part forty one


The miniatures were painted and varnished before I added some static grass tufts to the bases to finish them off. I think they are perfect as a Silver Bayonet group - A Demon gentleman with his Goblin retinue and I can't wait to see how they behave on the table top.

Tony

Friday 7 April 2023

Flintloque/Silver Bayonet cross over - part forty


The first real colour on these miniatures was the flesh areas which were picked out and highlighted with a home-made Snakebite Leather mix and white. Subsequent highlighting was done by adding more white to the palette.

The clothes were painted in subdued colours with just one or two highlights. I wanted a more muted colour scheme with these minis. I have used a touch of wash over the flesh areas to define the sculpted detail.


For most of the painting I have used either a Rosemary & Co. Sable/Synthetic mix brush or a GW detail brush as I find it is better for the really fine detailing such as eyes and teeth.

More to follow.

Tony

Wednesday 5 April 2023

Flintloque/Silver Bayonet cross over - part thirty nine

With the figures based and the groundwork textured, I undercoated the models with a grey spray-can primer which helped to unify the group.

Next, I gave the six models a basecoat of dark brown acrylic paint which was then lightened to give a Zenithal-style finish and help to highlight the sculpted detail.


In the past this basecoat would have been pure black, but I have adjusted my painting style to be less stark and I now find the dark brown base with highlights to give a better painted finish.

More to follow.

Tony

Saturday 1 April 2023

Flintloque/Silver Bayonet cross over - part thirty eight

It has been some time since I posted about my Flintloque/Silver Bayonet cross over project but a recent visit to The West Midlands Military Show (See earlier posts) saw me pick up a blister pack of The Silver Bayonet Goblins (TSB011) and combining them with the Demon Gentleman (Alternative Armies) meant I could now work on a new group of themed miniatures.

The Goblins were mounted on to 1p coins and the Demon on to a 2p coin. The groundwork was built up with Terracotta Milliput and then further textured with sieved stones and sand applied over PVA glue. The image below shows the group ready for undercoating or priming.


The figures have been used straight from the box with no alterations or modifications (a rare occurrence for me) as I was looking forward to the painting of this group - I have had the AA Demon for a couple of years and been wondering how I could use him. With this group of Goblins I now have a leader and his diminutive followers all ready for action in a game of The Silver Bayonet.

More to follow.

Tony