Friday 30 April 2010

Billy (the) Piper - part eight

This latest update features the painting of detailed parts of the Highland Rat Piper, the bonnet feather, the gatters and in the final photo the knapsack and water bottle.

The miniature is fast approaching completion and should have all painting finished very soon. You will notice how I am still playing around with the tartan and the red and white stripe on the bonnet. I am sure that this will continue until I am fully satisfied with the effect.


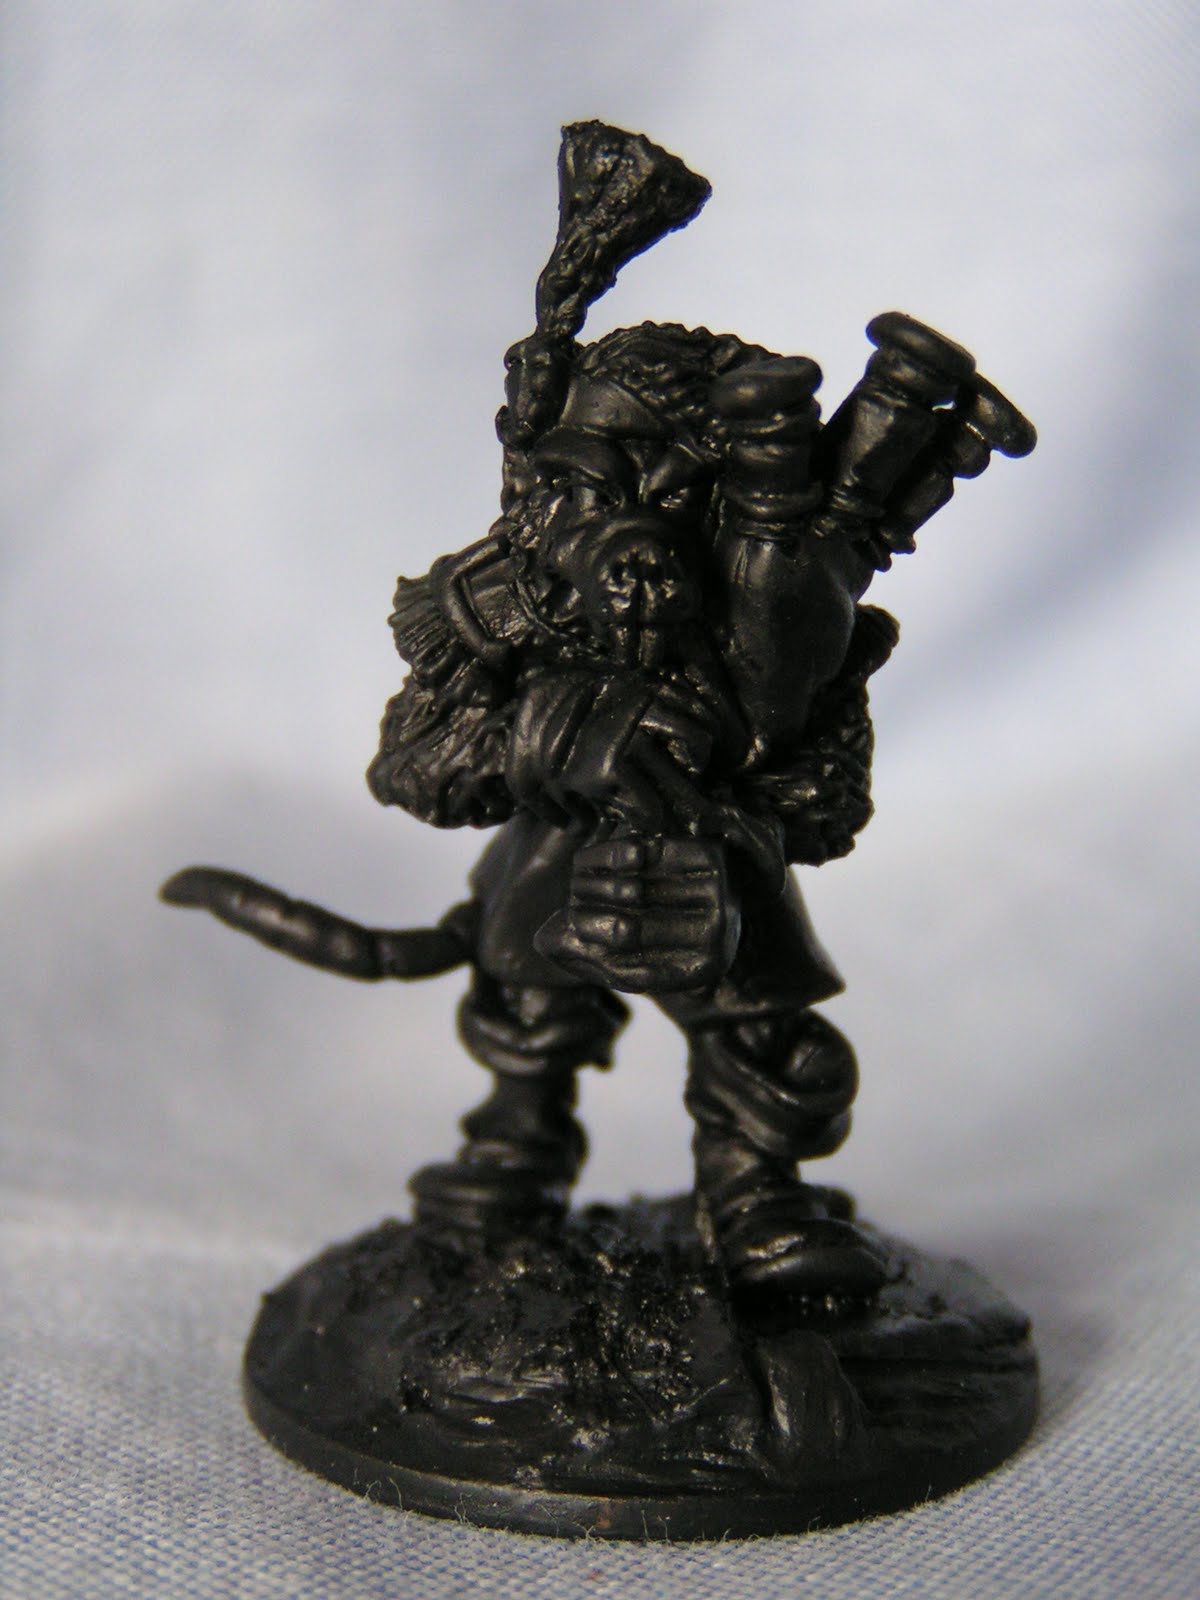
Once again I have tidied up the black areas, but in this update there was very little to be done. You can also see one of the modifications I have made to the casting - the simple, circular badge to the back of the knapsack which was modeled with a 'green stuff'/Milliput mix.
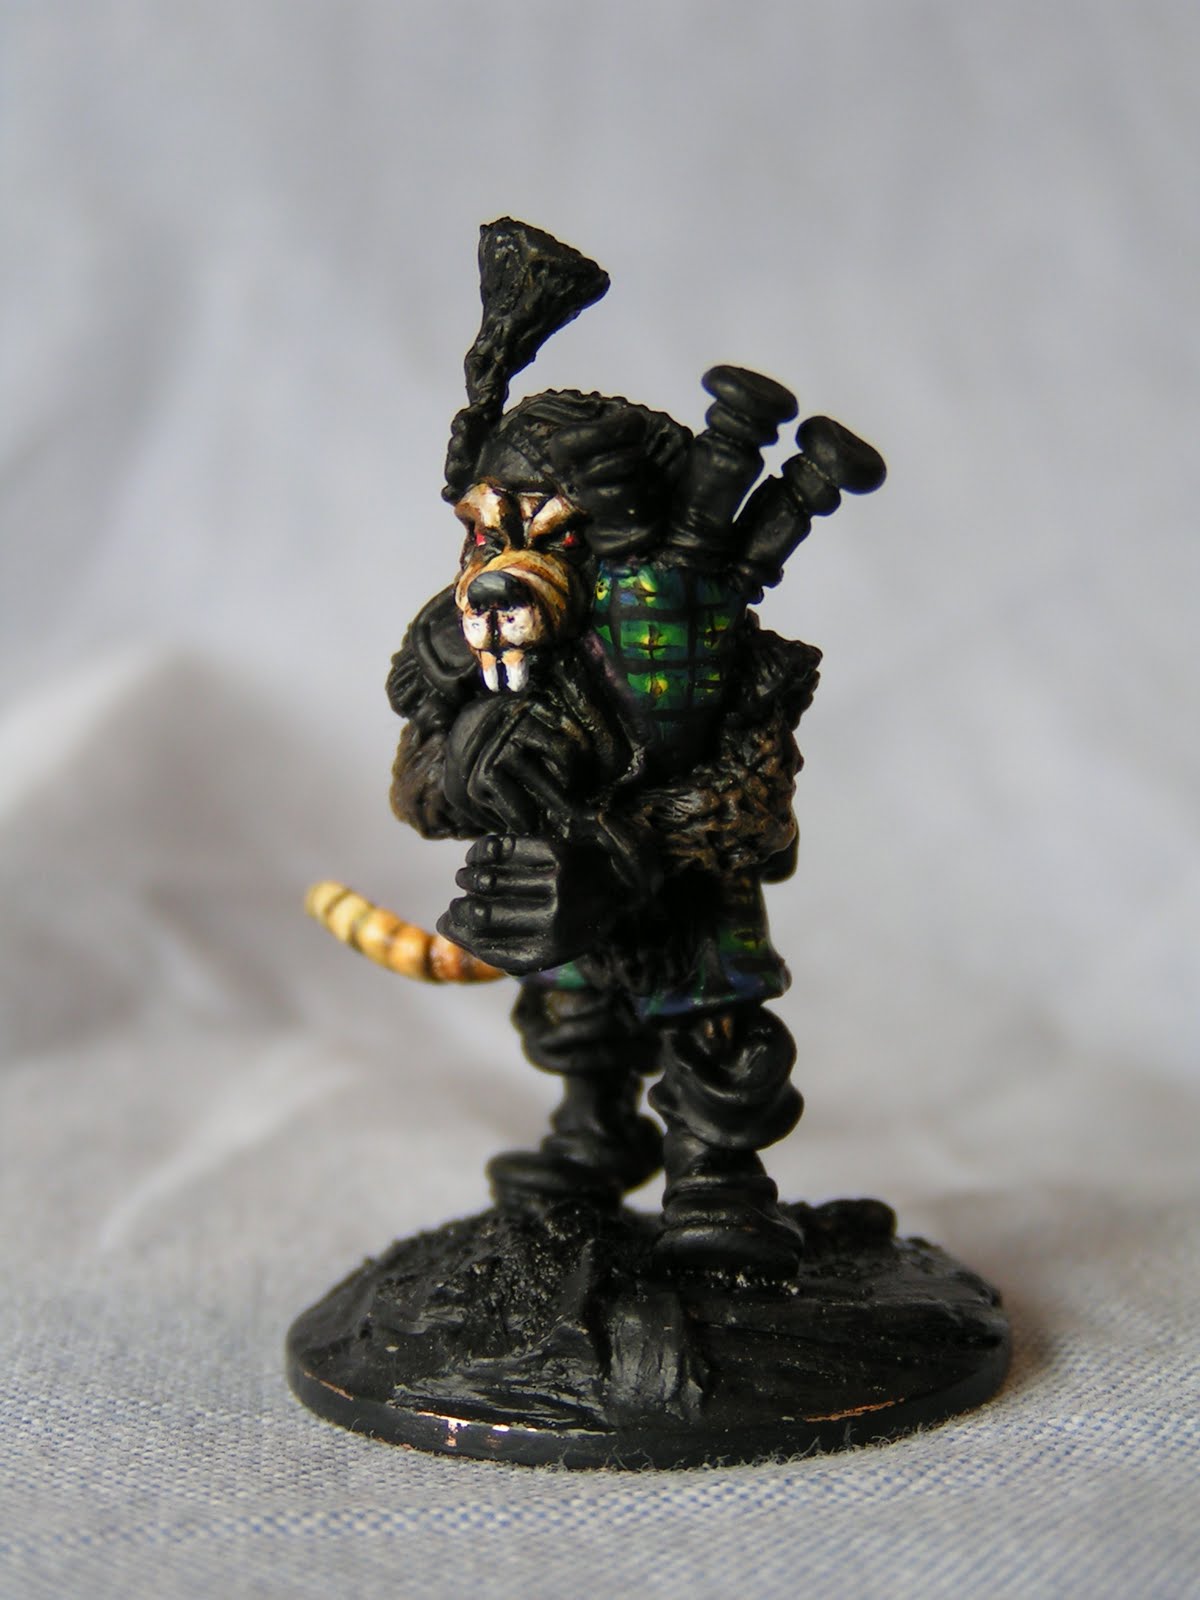
Tony

Wednesday 28 April 2010

Greek Temple in plaster - update

Following on from my earlier post, here is the finished Temple base. The model was originally made as an alternative base to the Greek Temple 'master' I had produced for Grand Manner, however after Dave at GM saw the work-in-progress, I was persuaded to amend the model so it could be cast in resin and offered as an alternative to the simpler, flat base.

The bulk of the model is plaster castings of the original temple, with the stone sides being modified wall sections and rock face castings. The cave section has a lift-off roof. Full details of the Greek Temple model should be up on the GM site very soon, the roof section was being cast when I visited yesterday evening.

The miniature is a 40mm Spartan Games Argonaut (still up-painted), however the temple was originally designed for use with 28mm figures.


I am sure that a finished and painted temple will be available for photographing very soon.

Tony

Tuesday 27 April 2010

Billy (the) Piper - part seven

On my earlier or first Highland (Rat) piper I had painted the tops of the bagpipes white and the gloss varnish I had used, had given this white a cream colour. I wanted to reproduce this cream or ivory colour and therefore started with a pot of Legionnaires Flesh (an old Warzone paint). I then highlighted by adding white to the flesh colour, until the brightest or final highlight was pure white.

In addition I have painted the bonnet feathers. I used a drybrushing of a very dark blue, a mix of GW Chaos Black and Midnight Blue. This is a secret that many comic book artists use to portray very dark black - just add blue. If you doubt it take a look at how Batman is coloured in most of his comic book illustrations!

Finally for this update, I have washed the gloves with Citadel Badab Black wash. I felt the white was a little too stark and the wash helped to define the knuckles. A quick pin-highlight with pure white and the detailing around the white gloves is so much more exaggerated.


As with earlier posts, I have tidied up the Black areas before taking these photos.

Tony

Monday 26 April 2010

Flintloque Buildings - Last chance to purchase at discounted price

This is your last chance to purchase the Limited Edition Flintloque Building Set at the discounted price. At the end of April the basic cost will rise and the free postage offer to the UK (reduced postage to rest of the world) will end, for full details see;

You now have five days to place your order/orders. Any queries, you can contact me direct or order via Grand Manner.

Tony

Sunday 25 April 2010

Greek Temple in plaster

Saturday morning was spent shopping and checking on my daughters leaking washing machine. However on returning home, I was confronted with a box full of Plaster of Paris castings of a Greek Temple, the original of which I had modeled for Grand Manner earlier in the month. For those who regularly follow my Blog, you cannot fail to know that I produce 'masters' for Dave at GM. These particular castings are different, as I had asked Dave if he could cast them in plaster rather than resin, so I could build myself a diorama or special feature of a raised temple base with rocks (also plaster castings) and even a cave built into the side.

The castings were still raw or slightly damp and very easy to work with. The base is a large piece of packing foam, with the plaster panels glued to the foam with No More Nails and the joins filled with DAS modelling clay.

The steps to the front and back are cut and textured Pink Foam which I still need to cover with watered-down filler, but what you see here is a day of modelling at the bottom of the garden, a great day of modelling in the sun, one that I thoroughly enjoyed.


My intention is to model the temple as a partial ruin, the actual 'master' is a complete and non-ruined casting, but as usual I wanted a modified model, something very original to act as the basis of my 40mm Typhon or Ancient Greek project. Whether it will ever be used as such is debatable as the collection of Spartan Games Argonauts are still to be painted.

The main reason for this latest post is that I now realise I have finally found my preferred modelling medium - Plaster, working with it it almost second nature and so much easier than trying to convert resin castings and fill sculpts with Milliput. My preferred modelling material, DAS works so well with the plaster (always remembering to wet the plaster and use some uPVA glue as a bond).

This is a huge model, 36cms long, 24cms wide and so far 8cms tall (that's so far, as the temple building still needs to be added to this base). My intention is to fully textured a baseboard, 60cms x 60cms and use it as a centre piece.

I hope that you enjoy the work-in-progress shots, but really it's all about me having fun!

Tony

PS.
Dave just came around visiting (out for a ride on his Triumph motorbike) and having seen the work-in-progress, now want to cast this in resin! So we may see this temple base as a Grand Manner model.

Friday 23 April 2010

Billy (the) Piper - part six

In painting the white areas, I used a self-mixed light grey base, almost pure white for the main colour 20% light grey and 80% white and 100% pure white for the highlight with small amounts of the earlier colour showing through at the edges. Very similar to the Kevin Dallimore or Foundry painting technique.

I have also continued to touch-up the tartan areas, highlighting with light green and pure yellow as well as painting the red/black bonnet ribbon. Throughout the painting process I am continuing to add and define the Black Watch tartan and the red/white check.


As stated earlier in this series of On-Line Build articles, I think that these Highland Rats are some of the very best sculpted Alternative Armies/Flintloque miniatures. With the white painted, this single piper is starting to 'come to life'.

Finally, this weekend we see the largest UK based show - Salute at Excel. I will not be attending, but look forward to reading reports and seeing many, many photos of what I am missing.

Tony

Thursday 22 April 2010

Stanley flush cut pull saw

I have been looking to replace some of my well worn razor saws or modelling saws as they have been abused, cutting lead miniatures and resin. I came across this flush cutting saw from Stanley and thought that it would be ideal for resin.

However I am now, not sure. On the plus side it has to be the sharpest saw I have ever come across, the card protector sleeve is not there for show! The down side is that it has no strengthening spine and the blade (as it says on the label) is flexible.

A pull saw cuts on the pull or return stroke, unlike a conventional saw that cuts of the push stroke. I am sure that for resin, particularly fine pieces, it will be OK, but I will still need to replace my selection of razor saws.

I'll keep you informed as to how I get on with this little monster.

Tony

Follow-up
This evening I have tested the saw on Resin and can report that it made very short work of cutting it. In addition due to the flexibility of the blade - I was able to cut right down to the base without any issues.

Follow-up 2
This evening I used it to cut some plaster rock mouldings, went through them like a 'hot knife through butter'.

Wednesday 21 April 2010

Billy (the) Piper - part five

Another three photos, and this time it's all about the Red's. Of which there is very little!

The colour is built up over a Black undercoat, with a GW Red Gore/Scab Red base, a Blood Red main colour and Blood Red/Vallejo Hot Orange extreme highlight. The Red and Orange mix has 75% red and 25% orange and is really just a final pin-highlight as you can see.

Once again I have tidied up the Black prior to taking these shots.


Tony

Tuesday 20 April 2010

Billy (the) Piper - part four

It's all about the Tartan!

A dark blue base, highlighted with mid blue, then green checks and yellow highlights. In more detail; GW Midnight Blue (mixed with Black for the shadows) and highlighted with Enchanted Blue. Once fully dry the Snot Green checks were painted on and highlighted with a touch of Sunburst Yellow. The areas where the green horizontal stripes and the vertical stripes cross was then painted with a very yellow mix of Snot Green and Sunburst Yellow and highlighted with pure Sunburst Yellow.

Finally (and using a very fine or detail brush) I pained a Black cross over each of the yellow areas.


You may not see it on these photos, but after painting the tartan I realised that I had not painted the tartan on the bagpipe area below the hands. I had to re-mix all of the paints again to finish this area!

Much later I saw an illustration of a Black Watch piper in the W. Britains 2009 Spring/Summer Collection Catalogue. The pipers at the time of Waterloo had a different tartan to the one worn by the troops. The tartan worn by pipers had a red base, blue checks and white stripes! I do not intend re-painting it.

Once again, I have tidied up the Black areas before taking these photos.

For those who have not seen the earlier posts, I have decided that this miniature will be given away in a competition/prize draw. Details to follow once the figure is finished.

Tony

Sunday 18 April 2010

Harz Platform and Edging

Some time ago I was asked by a friend if it was possible to produce a cobbled platform surface and edging in 1:22.5 scale for use on a model railway layout. The layout is based on the Harz Railway in the former East Germany and is quite well known as a tourist attraction (as well as the site of an Eastern Bloc satellite/radar listening site during the Cold War). For more details, see;

The two images below show the finished 'masters', which will now be molded and cast in resin. I was specifically asked to keep the castings simple and generic as each of the platform edges on this particular layout are over 60inches long. The platform edging master being over 20inches long.

The original masters were produced from various thicknesses of Plastic Card, Milliput and individual 5mm square cobbles.


Finally, this photo shows the actual Harz Narrow-Gauge RailwayPlatform and the unique concrete cast edging blocks

Although not my usual Blog content or project, I was particularly pleased with the way that the masters have photographed.

Tony

Saturday 17 April 2010

My 75th Follower - a competition?

Earlier today the 75th Follower joined my Blog! Welcome to Captain Neven. I'm not sure if this counting of followers is a good measure of how well a Blog is doing or not, as I see 'My Blog' as a visual diary, however following a suggestion from my daughter (who knows about these things) I am going to have a competition or prize draw amongst all my followers.

The prize will be Billy (the) Piper, see earlier posts. Although at this moment I am not sure how I am going to decide on the winner? Any suggestions or is it just throw a D100 and re-roll for any number above 75?

The draw will take place once Billy is finished, so follow the On-line Build to see how it progresses.

Any new Followers between now and the draw will obviously be included. Thank you to all who regularly pass comment old or new.

Good luck.

Tony

Friday 16 April 2010

Billy (the) Piper - part three

With the exception of the drybrushing, the miniature was painted with a Citadel Standard Brush, I find these a good general purpose paint brush, that hold their point well, but can deteriorate quickly if miss-treated.

Starting with the flesh, well fur actually, I dry brushed the head, arms and knees with a 50/50 mix of Vallejo Charred Brown and Black. Then a lighter drybrush of just Charred Brown and paying special emphasis to the elbows and face I used GW Snakebite Leather to lighten the fur/skin colour.

The face and tail were painted with GW Snakebite Leather, some Vallejo Model color Sand Yellow and highlighted with Vallejo Dead White. This was a matter of layering lighter and lighter highlights - up to near pure white, especially around the mouth.


Detail painting; The eyes are pure GW Blood Red over Vallejo Dead White (to give brightness) the nose is Dark Grey (a mix of Chaos Black and White) and the teeth were first painted with a mix of Snakebite Leather and Dead White before highlighting with pure Dead White.

Throughout the process, I have washed the areas with with Citadel Flesh Wash (the old blue topped paint pot) and the new Citadel Washes of Gryphonne Sepia and Badab Black.

Finally and just for this On-Line Build, I have tidied up the Black areas before photographing.

Tony

Thursday 15 April 2010

Massive Voodoo Blog

I have only recently become aware of this Blog site and would recommend modellers and figure painters to check out the Tutorials/Articles. The sections on building bases are quite exceptional and very well illustrated.

For more details, please see;

Tony

Daylight/Craft Bulbs

For over ten years I have used various Daylight or Craft Bulbs while modelling and painting miniatures. My modelling workbench is set up with two angle-poise lamps, one to each side, one with a plastic magnifier lens and the other with a professional glass magnifier (both of which I rarely use).

Both lamps use 40watt bulbs (any higher and the heat starts to melt the plastic housing), one with a bayonet and the other with an Edison fitting.

The last time I tried to replace the bulbs, I had great difficulty in finding a supplier, I can get 60watt and even 100watt replacements, but the 40watt bulbs are becoming very rare. The option of replacing the bulbs with 'Energy Saving' bulbs is complicated in three ways - there is some confusions in which bulb is a true replacement (any help on this subject would be greatly welcome), the new spiral or 'candy-twist' bulbs are too large or long for the bulb holder and finally the cost - the nearest replacement I have found is £9.99 each, compared to £2.00 - £2.50 for a Craft Bulb. Earlier this year my Mother accepted the challenge of finding a 40watt bayonet and 40watt Edison and was very pleased when she phoned to say that she had found and bought me a pair. Now that I have them, I realise that they are in fact blue coloured bulbs rather than craft bulbs, the sort that you would find on fairground rides or at Blackpool Illuminations. The difference is quite stark! Obviously.

Then earlier to day I found an Internet site that was selling 40watt Craft/Daylight Bulbs with Edison fitments, but was completely out of bayonet bulbs. For anyone in a similar situation to me the site is;

I have ordered three, knowing that I will not be able to purchase these bulbs for much longer. I find it quite frustrating that I am not able to purchase the bulbs I want/I need now that new regulations have forced companies to stop producing the 'old style bulbs'.

On a separate note, although connected as it was my Mum who suggested its use, I have this year been suffering with dry and chapped hands - more than likely due to the very cold winter. Mum bought me a tube of Vaseline Intensive Care Sheer Infusion lotion and within a couple of week the problem has disappeared. Anyone else who has found this Winters weather to have similar effects may want to check it out.

Quite an unusual post this time, but Hey, I tend not to be too organised! And both subjects are (sort of) modelling connected.

Tony

Tuesday 13 April 2010

Billy (the) Piper - part two

Billy is now undercoated, GW Chaos Black. However I thought I would list the modifications I have made to the basic miniature.

The most noticeable is that the bonnet feather or distinctive 'red Hackle' has been extended and enlarged. I used a mix of Milliput and 'Green Stuff', plus a small touch of superglue to ensure it stays in place. The right stocking has been re-sculpted, again with some Milliput/Green Stuff mix. The backpack (not shown in these two photos, has been tidied up, there was a heavy fold in the side of the backpack, I'm not sure if this was a casting flaw or it was intended to be there as it appears on the initial piper model as well as this second casting. I partially filled it to make it less prominent). Finally I added a small circular badge to the back of the pack, I have seen similar badges on the backpacks of the 42nd Highland Regiment.


I will get around to painting some colour in the next post - but this should give an idea of how I prepare my models.

Tony

Monday 12 April 2010

Billy (the) Piper - my latest on-line build.

It's been some time since I painted this Ratman Piper from the Alternative Armies/Flintloque box set - Highland Rat Infantry 44th Strathcarnage & Killmore (56502). Then earlier this year at the WMMS - Alumwell, I picked up a second-hand piper figure for £1.00. This prompted me to paint a second Piper (called Billy).

Photo One - Shows the initial finished and completed piper from my collection. It is based on a 2p piece and is painted in the same scheme as shown on the box front. It has already been featured here on this Blog at;

Photo Two - The second-hand miniature mounted on to an old 1d coin, in fact an Irish 1d, pre-decimal coin. Please Note that the casting was already painted/undercoated black when I bought it. I didn't feel that it was worth stripping the paint off as I normally work off a black undercoat.

Photo Three - I have built up the base with cork pieces, Milliput and sand.

I am not sure I have said this before - but these some of the very best sculpted Flintloque Figures in the whole collection, full of character, beautifully sculpted and with a 'hefty feel' and the piper is the best sculpt in the set. Does anyone know who sculpted these for AA?

The figure is 35mm tall (base of foot to top of head, 40mm to top of feather).

It is strange that since starting On-Line builds, I have found that I miss not having one on the go. I am also sure that they help to improve my painting techniques as well as being therapeutic! If any followers were to copy my example and keep a log of their on-line builds, I am sure it would be successful.

I am planning on some (minor) conversion work on this figure - what's the point of having two identical miniatures? I will give more details in my next up-date.

Tony

Sunday 11 April 2010

Scratch built Rocketship

I have just come across this post - a Flash Gordon style Rocketship built from a plastic bottle.

For for information check out;

And

There are other bits and pieces on the Blog that should inspire.

Tony

Friday 9 April 2010

Flintloque Dwarf Uhlans - finished

My latest regiment, the Flintloque Dwarf Uhlans are now varnished and based. For those who have followed this on-line build, you will know that the miniatures are converted Alternative Armies/Flintloque Krautian Guard (52502), modeled as dismounted Uhlans and not based on any actual regiment, but instead are a mix of Internet and Google searches for suiltable uniform colours and facings.

The final stages of painting include, painting the bases, GW Snakebite Leather, highlighted with Snakebite Leather and White, the individual stones are painted in various Grey's and highlighted with White. Additional detail painting included some Flesh highlights, a touch of Blood Red to the pompoms and small touches to the flag.

The miniatures were first varnished with Ronseal Hard Glaze and when dry I painted on three coats of water based Matt Varnish before adding the static grass.


I have so far not written any background to this, my latest Dwarf Sauerkraut Wars Regiment, but will have to come up with a story as to how they lost their mounts and found their huge blunderbusses!

Overall, I am very pleased with this cheap e-bay purchase, they have taken a little longer than I would have planned, but as I am in no hurry, I don't worry too much. Finally, I think the pale grey uniform colour actually works better than the 'official' dark blue/black uniform recommendation and the 'plum red' flag adds a great deal of welcome 'colour' to the finished group. I hope you agree.

Tony

Thursday 8 April 2010

Medieval Buildings - Update

The latest batch of new releases are now being featured on the Grand Manner Shop Site. In addition I have just come across this post by Darrell Hindley, who has some pre-release photos of the Modular Medieval Buildings, see;

The Photo below shows the Two Storey House with Jetted Gabble End (ME58)

There is a whole range of similar (modular) buildings From ME51 - through to ME65 which were initially modeled by me. For full details check out the Grand Manner Shop Site at;

In addition the Flintloque/Napoleonic Building set is also included under LS43, 44 and 45, However at this time there are still no finished or painted examples - these really are 'hot out of the molds!' If you want to see examples - please check out earlier Blog entries labelled Flintloque or see;

You will see from this huge new range of buildings that I have been very busy and just maybe have not been updating this Blog as often as I should. But with this new set of releases, I feel I can take a well earned rest - well that is until I start the next project, which at this time must remain a secret.

I'll update once I have painted examples.

Tony

PS.
It is quite common for Dave to amend my 'Masters' prior to casting, thicken walls, add membrane to windows and doors etc. The 28mm Dovecote has some great little additions that I think really add to the character of the casting. Dave has modeled four small doves/pigeons, three on the roof section and one on the ground. Well done.

Friday 2 April 2010

An Easter visit to Worcester

Susan, my Wife and I decided that we would have a morning in Worcester, we were looking at picking up some alternative Easter presents (rather than just chocolate eggs) and decided that a visit to the charity books shops was in order. The objective was to pick up suitable books for Gareth (our son), Beckie (his fianceé), Holly (our daughter) and Mark (her boyfriend) who would all be visiting some time over the Easter weekend.

While I was browsing the shelves in WHSmiths, I picked up two magazines - the first was this months issue of Wargames Illustrated, I was particularly impressed with the Paul Davies article on page 68, How to build an Early Irish Christian Church and would recommend the magazine just for this one article! I can see the techniques being used in other building projects and I may even reproduce the stone church myself. Although I would use DAS modelling clay rather than filler.

The same issue also has the Grand Manner advert (page 58) which has already been commented on. Issue 270 is very well filled with articles and illustrations, more so than in previous issues, it ready is becoming a very well produced magazine, one that I enjoy looking at the pictures as much as reading the text - well done. I think the term 'Eye-Candy' (in a positive way) describes this particular magazine very well.

The details are; Wargames Illustrated, issue 270 - April 2010 with a cover price of £4.00.

The second purchase was the March issue of Military Modelling which I picked up for the fantastic article by Emmanual Nouaillier on painting advertising posters. I have commented on Emmanuel's work in previous posts, but this article, where he reproduces a Dubonnet poster with paint, is without doubt a fantastic piece of modelling and painting. If you have not seen this mans work before - please check it out, you will not be disappointed.

Other articles of note are; Panther in the Mud by Steve Zaloga, this author never fails to entertain and inform. I always look forward to reading his modelling articles. A second article by Chris Meddings called Ringer - the story of a Dieppe Churchill tank is also worth checking out. I am not necessarily a great fan of MM and rarely pick up every issue, however this one is well worth the £3.95 cover price.


Back to searching the charity shops and Sue had found a whole host of second-hand modelling and reference books and pamphlets in the Oxfam Book Store. The first is this reference and modelling book (a card cut-out and glue book) called The Merchant's House, Bromsgrove. The book features the very first building that was reconstructed on the Avoncroft Museum site, Bromsgrove. The model in the books looks to be 20mm/25mm scale, but with a little bit of work or re-scaling could be used as the basis of a 28mm historical reproduction. With so many on-going modelling projects on the go at this time, I would expect this to take a 'back seat'. But it would make a fantastic wargaming model. For more details of Avoncroft Museum check out;
http://www.avoncroft.org.uk/

My second bargain was this card-backed brochure of the Weald and Downlands Open Air Museum by R. Harris (who has also produced a fantastic reference work entitled Discovering Timber-Framed Buildings, which I regularly use for reference). The booklet covers a number of the museum exhibits with black & white photos and illustrations of the buildings that have been saved.

Finally (while Sue was still shopping) I took the opportunity to photograph some of the timber-framed building in Worcester City Centre, here are just a few of the photos that give a feel for what to expect if you do the same.


And the reason for these photos, I've been working on a group of generic and interchangeable Early Medieval Buildings (Town Buildings) in 28mm scale for Grand Manner, the plan is to have a selection of buildings with separate ground floor, first floor and roof sections that can be built in different configurations with the option of sections turned 180 degrees to give different frontages. Here is a Work-in-Progress shot of the first releases, all buildings feature internal detail with optional chimney & dormer windows.

"Of special interest is the way that the 'real' building are not 'square', there are some very obvious curves and wavy timbers, while the model buildings (due to the fact that they are interchangeable) are all 'clean and square'. Ideally I would have loved to have some seriously bendy buildings, but this will have to wait for single or signature models which will hopefully follow."

I am currently working on a couple of supplementary buildings, 'in-fill buildings' that can be used to offer variety to the street front. I would expect full details to be available very soon.

Back to the books, we did manage to pick up a book each for Gary, Beckie, Holly and Mark, (plus chocolate Easter eggs). But I came back with the best Easter presents - two magazines and two great reference books!

Happy Easter.

Tony

Thursday 1 April 2010

March 2010 Update

Yesterday afternoon I spent some time over at Grand Manner. I needed to drop off a couple of models for Dave to put into molds. A simple couple of minutes turned into a couple of hours and I came away with even more projects and books to study. A visit to GM is a great way to re-kindle your model making enthusiasm.

Dave is a little behind with all the mold making, he is estimating that close to 60 new models will be available and featured on the updated GM web page through April. I am always amazed at how quickly Dave can model and sculpt compared to my feeble (and slow) efforts. As already mentioned his latest advert features some of these new models and the SHOP section shows even more, see;

Finished projects that I have been directly involved it, include;
AWI/ACW - particularly the model of Hartwell Tavern and the Guilford Courthouse group in 28mm.
A European Windmill - a multi-part model of a generic corn grinding windmill, again in 28mm.
A Tudor- Style Dovecote - based on an illustration and the building at Luntley Court, Hereford. I believe this to be one of the 'prettiest building' I have ever produced.
A whole load of early Medieval Town Houses and Shops - totally interchangeable buildings with optional ground, first floor and roof castings, internal detail and various optional parts for the diorama builder.
A modular section of Harbour Wall which features the main wall section which is designed to be extended and/or displayed at 90' angles, a floating wooden walkway, steps and a section of upper paved dock.
And the Flintloque or Napoleonic Building Set (also featured here on this Blog).

I addition to this Dave has worked on Medieval Farm Buildings and a new large church.

All, in all, a very busy three months of model making.

Other non-GM projects I am working on include;
Another article for Barking Irons - the new magazine from Alternative Armies.
A Victorian Science Fiction (VSF) model of a Flying Aeronef in 1/300th scale to be featured as a written article in a magazine very soon and various outstanding Workbench articles for The Miniatures Page (TMP).

All of which will be detailed here over the next couple of months.

Tony

"They say if you want something done - give it to the busiest person."