Sunday 31 October 2021

Happy Halloween


Foul Mouth Freddy and the Worm of Villa Rocca.....

All Hallow's Eve just wouldn't be the same without a tall tale on Orcs in the Webbe and here in 2021 we have this fishy story for you to enjoy. For full details see this link.

Earlier All Hallow's Eve Tales can be found here.

Tony

Saturday 30 October 2021

More Trees - part thirteen

The base or groundwork has been painted in my usual home-made Snakebite Leather, drybrushed and washed with odd stones picked out in grey. The trunk has been painted in a dark brown/grey with hints of green.

The base was further decorated with scatter and flocking before I added clumps of ground foam. This home-made tree is 190mm tall and mounted on a MDF base that is 95mm x 70mm.

The final image shows a Flintloque RifleOrc alongside to give an idea of scale.


I'm very pleased with how the tree looks, but disappointing as it is a little fragile. The poly-fibre core isn't that firm and I would only recommend this technique for trees that are not going to be handled too much.

Tony

Friday 29 October 2021

More Trees - part twelve

The long plastic tube trunk was cut down and a new shorter trunk made from florist's wire wrapped with thread was added. The exposed edges were sealed with superglue prior to gluing the tree to the MDF base.

The base and roots were built-up and sculpted from DAS modelling clay. I enjoy sculpting the roots, adding small sausages of DAS and sculpting the surface with a plastic sculpting tool as well as scoring the trunk with the blunt edge of a scalpel.


I just have to add some additional ground cover/texture before painting the base and trunk.

Tony

Wednesday 27 October 2021

More Trees - part eleven

The tree was flocked with a variety of different flocks, darker flocking for the main areas and a lighter flocking for the upper edge.

I used matt spray varnish as the glue and gave the tree armature a good soaking before applying the flock.

The base was cut from an off cut of MDF and trimmed to shape with a large snap-off bladed knife before being sanded smooth. I superglued a metal base to the MDF which will help to stabilise the tree when it is glued in place.


With the flocking in place the home-made tree is beginning to look like a model tree and I'll be modelling the base once the matt varnish has fully dried.

Tony

Tuesday 26 October 2021

More Trees - part ten


The wire and bristle tree armature was wrapped with poly-fibre. The fibres were pulled apart and just placed on the bristles. I continued until I had a 'full' tree.

In my next post, I will show how I flocked the tree.

Tony

Monday 25 October 2021

More Trees - part nine

My earlier posts have shown how I have modified shop bought trees, trimming branches and re-flocking as well as re-basing the models to produce more realistic models. In these posts I will show how I built a model tree from scratch.

I used some bristles from a garden broom and wire to make this armature which was twisted with the aid of an electric drill and the cup hook (shown next to the broom on the right). I found it best to add some hot glue to the bristles prior to twisting as they had a nasty habit of just falling off the wire when I tried to twist them.

The rather scrawny tree frame had a trunk added from some plastic tubing (a piece of plastic balloon handle) which was also glued in place with my hot glue gun. The tree was then painted with some grey/brown acrylic paint to which I had added standard ready-mixed filler (to bulk out the trunk).


The root structure was modelled from some florist's wire glued in place with superglue. The tree frame didn't take that long to make, but was fiddly and I'm not sure it was worth it. I will post further images once I have some 'body' or foliage added.

Tony

Saturday 23 October 2021

More Trees - part eight

The ugly Jarvis tree has been based and given a haircut. I used DAS modelling clay to build up the base and re-sculpt the roots while I used a small set of scissors to trim the branches into a more realistic shape.

The branches were flocked with a mixture of ground foam and flock over PVA glue.

The base was painted in a homemade Snakebite Leather mix and highlighted by drybrushing before adding the usual scatter material and ground foam decoration.


The final image shows a Flintloque RifleOrc alongside for scale. The latest tree is 160mm tall and mounted on a MDF base which is 80mm x 80mm.

Tony

Friday 22 October 2021

Another Magazine Haul


Sue and I visited Malvern yesterday enjoying the sunny weather and visiting the shops. I was lucky enough to pick up these magazines from one of the charity shops. Just £4.00 for all five - enough to keep me going for a while.....

Tony

Thursday 21 October 2021

More Trees - part seven

Treemendous October continues with what I think is the ugliest tree I own.....

It was bought from Worcester Wargames for just £2.00 and was packed in a Jarvis Terrain plastic bag (although I'm not sure who made it as it was a second hand purchase). It looks like a simple wire brush that has been flocked and had a plastic base added, not very realistic but let's see what I can do with it.

Once again I have mounted it on to a MDF base which has been cut, trimmed and then sanded to shape. In addition I have added a metal washer to the base of the tree trunk. The tree and washer have been glued in place with hot glue.


I should be posting more images and description soon.

Tony

Tuesday 19 October 2021

More Trees - part six

Following on from my earlier post in which I detailed how the trees were modified and the base was built. I have now finished the painting. The groundwork was painted in my usual Snakebite Leather colour and the stones picked out in grey, highlighted with white. The silver birch tree trunks were painted in a dirty grey colour with some pure white splotches as seen when studying a similar tree that grows in a neighbours garden.

The painted base was then flocked and decorated with various flocks and even the odd static grass tuft while the final image shows a Flintloque RifleOrc alongside to give an idea of scale. The largest silver birch tree is 180mm tall and the three trees are mounted on a MDF base that is 150mm x 85mm.


I think the tree stands look great and I was very pleased with the final result.

Tony

Sunday 17 October 2021

More Trees - part five

Today's post details how I modified these shop bought Silver Birch models to make this stand of three trees.

Like the earlier tree projects these trees had been sitting in my shed unloved and ignored for ages. I seem to recall buying them in a charity shop in Shrewsbury, but can't be positive as it was many years ago.

The trunks have been lengthened and then beefed-up with masking tape and thread before they were glued in place on an off cut of 6mm thick MDF. I added some metal miniature bases to the MDF base as well as two small stones picked up from the garden before building up the groundwork with DAS modelling clay.

The three trees had extra foliage added by cutting up the remaining two trees and gluing bits in place with superglue. I wanted the three trees to be both taller than the originals and to have some variety in height.

The smallest tree has an unmodified trunk, while the other two have lengthened trunks. At this moment they are unpainted DAS, but you can see how I have sculpted roots to the bases.


More to follow and soon.

Tony

Friday 15 October 2021

More Trees - part four

Continuing with the theme of trees for the wargame table, today's post shows how I took this simple 'bottle brush' type tree and remodelled it into a more realistic example.

Once again this toy tree was from my collection of used model trees. It was a bottle brush style tree with foam beads and a broken trunk.

I used my paint stripping heat gun to melt the foam beads and clean up the branches, then set about trimming the shape with a small set of scissors. I might have gone a little too far as the shape was a bit sparse once I had finished.

The new trunk is a section of plastic tubing superglued in place and the flocking was some mid green foam flock I had in my spares box. I used PVA glue to attach the flock and two thick layers of flock to give a more luxurious covering.

The remodelled tree was attached to a MDF base with some metal bases glued in place before the groundwork was built up with DAS modelling clay and textured with sieved stones, sand and sawdust.

The base was painted in my usual Snakebite Leather colour and detailed with more railway scatter and flock applied over PVA glue as well as some ground foam glued in place with superglue.


The final image shows the two trees side by side. - the new tree is a great improvement over the simple toy tree and is 160mm tall on a MDF base.

Tony

Thursday 14 October 2021

More Trees - part three

The base has been flocked with various railway scatter and foam over PVA or superglue to match my gaming board.

The single tree is 170mm tall and mounted on a 100mm x 85mm MDF base.


The final image shows a Flintloque RifleOrc alongside the tree base for scale comparison.

Hopefully, I can post details of other tree models soon.

Tony

Wednesday 13 October 2021

More Trees - part two


Following on from my earlier Blog post, I have now bulked out the base with DAS modelling clay, making sure to add some exposed roots to the lower trunk and blending-in the slate chips.


The ground cover was then textured with a mix of sieved stones, sand and sawdust applied over PVA glue and then 'flooded' with diluted PVA glue to which I have added flow improve or washing-up liquid which fixes the loose particles in place.


The base and trunk was then painted in various browns, greys and even green while the rocky outcrops were painted grey and highlighted with a lighter drybrushing.


The final images, show the base washed with a Dark Flesh or Strong Tone wash to highlight the sculpted detail.


I just need to flock the base and it will be ready for the gaming table.

Tony
 

Tuesday 12 October 2021

More Trees

For the last couple of months most of my modelling time has been working on models for magazine articles but just occasionally you have to choose a project that is a distraction and in this series of short posts I will show how I went about adding more wargame table trees to my collection.

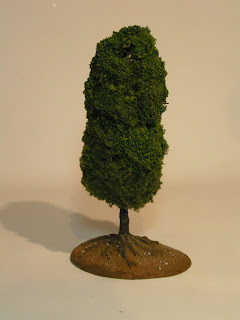
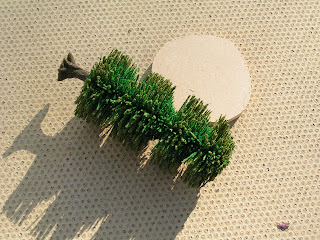
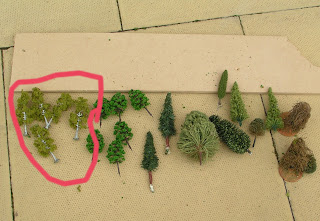
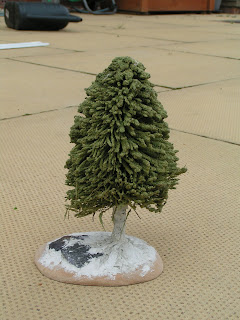
The first image shows a collection of toy trees that I have picked up over the years (some are over ten years old) and kept in a plastic bag, hung in a corner of the shed. While sitting at my workbench, I thought it was time I did something with them.

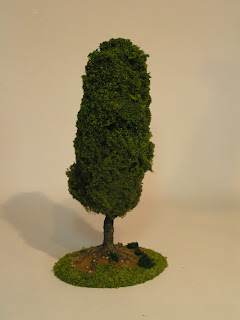
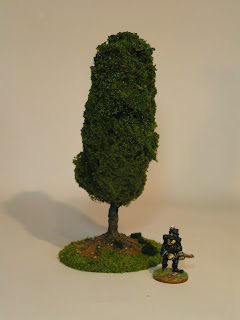
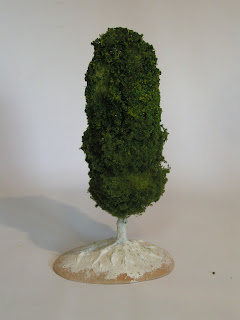
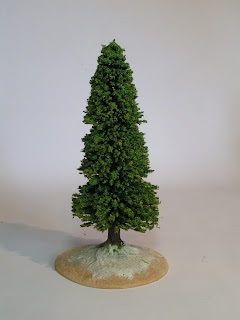
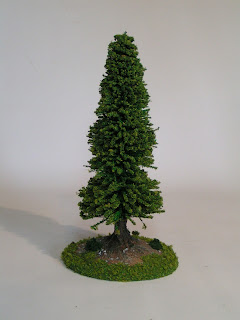
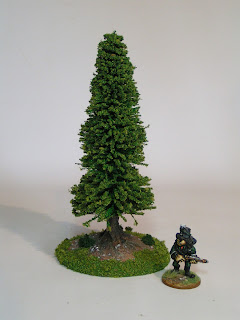
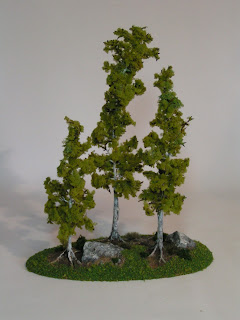
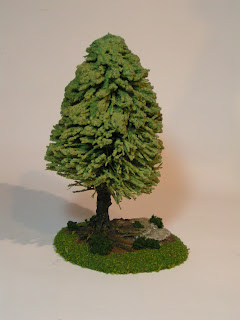
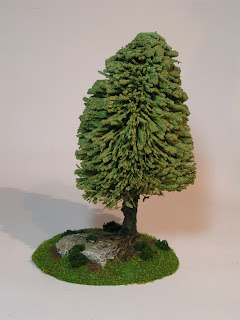
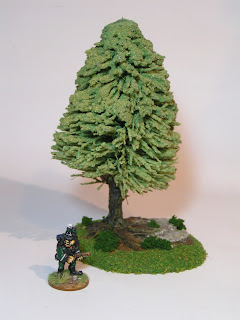
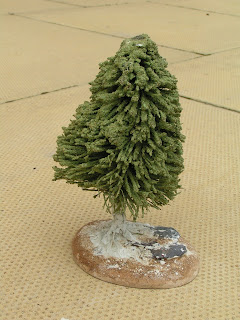
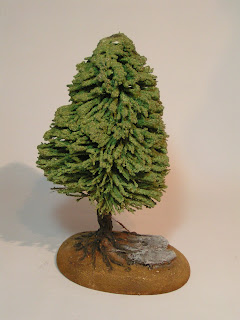
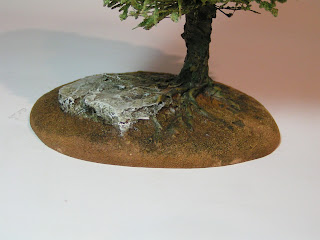
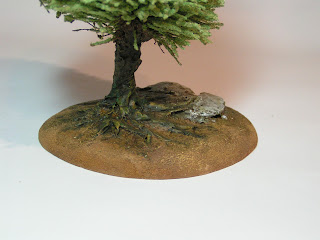
I choose the larger pale green evergreen as my fist patient (see image above) and using 6mm thick MDF for the base/bases set about modelling the first tree.

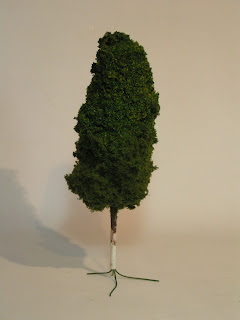
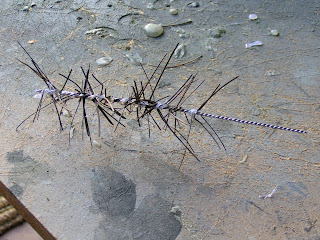
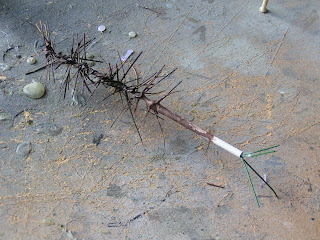
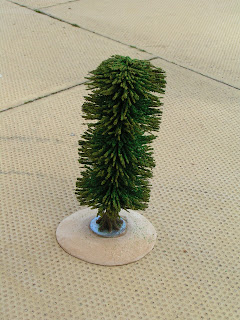
The trunk was both lengthened and thickened by adding some florist's wire roots and then binding the trunk and the wire with thread until I had a trunk I was happy with.


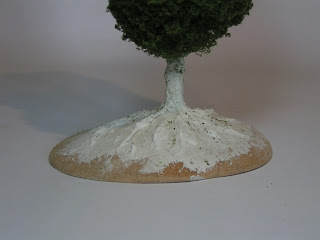
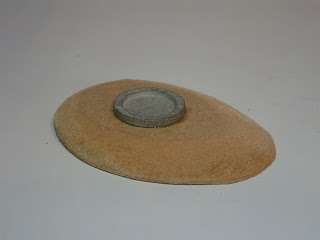
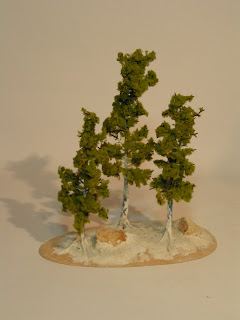
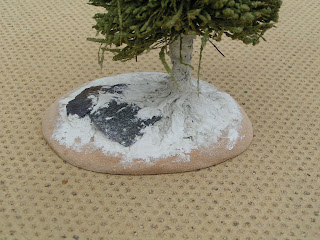
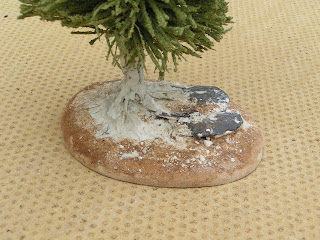
At the same time I started work on the MDF bases, cutting the MDF into rough ovals and then trimming the edges before sanding them smooth. The base on the right has been modified by gluing a metal miniature base to the top and then adding some slate chips over the top. I found it best to add these over hot glue as I wanted a firm bond.

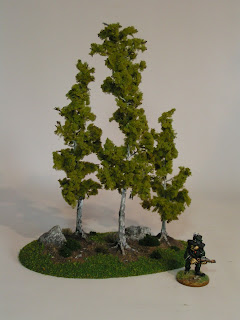
I chose the thicker MDF rather than plastic card as I find that wargame trees need a little more support on the table and the weighted bases also offer more stability during gaming.

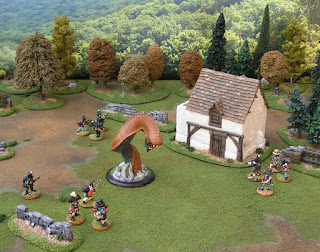
There are a number of Blog articles that show earlier model tree posts, for example - here and here.

In part two, I will show how I finished the bases.

Tony

Saturday 9 October 2021

Gaul Defence Tower from Asterix and the Cauldron

Another month and another magazine article showing how I build scratch built terrain for the wargame table. But this time it's a little different.....

Miniature Wargames issue 463 (November 2021) has this article showing how I built a Gaul Defence Tower from corrugated cardboard, card, egg box card and DAS modelling clay with a lift-off plastic card roof detailed with real wood.

The model was inspired by an illustration in the Asterix book Asterix and the Cauldron - in which the treacherous Gaul Whosmoralsarelastix uses his friendship with the Romans to trick the Gauls into searching out some treasure. I was struck by the illustration when reading the book to my grandsons and thought it would make a great centre piece for my Pax Bochemannica games.


Illustration taken from Asterix and the Caldron (used without permission).

For full details of this comic inspired piece of wargame terrain, check out the latest issue of Miniature Wargames.


Tony