Monday, 28 September 2015

A Pudigrochumsberg Barn for Flintloque


This scratch-built Barn was built as a challenge - to build a Pudigochumsberg themed piece of terrain to support the newest releases from Alternative Armies/Flintloque - the Pudigroan Line. For full details go to this link.

I wanted a completely different feel to this new piece of terrain and set about searching the Internet for suitable images.

In a moment of madness - I though "Dog Soldiers would live in kennels!" And the idea of a kennel shaped barn was born.

Image Two - This sketch is based on the traditional open-fronted dog kennel, the sort that we are all familiar with through hundreds of cartoons and comic illustrations


Image Three - The construction started by marking out some scrap cardboard.


Image Four - The kennel profiles were cut out.
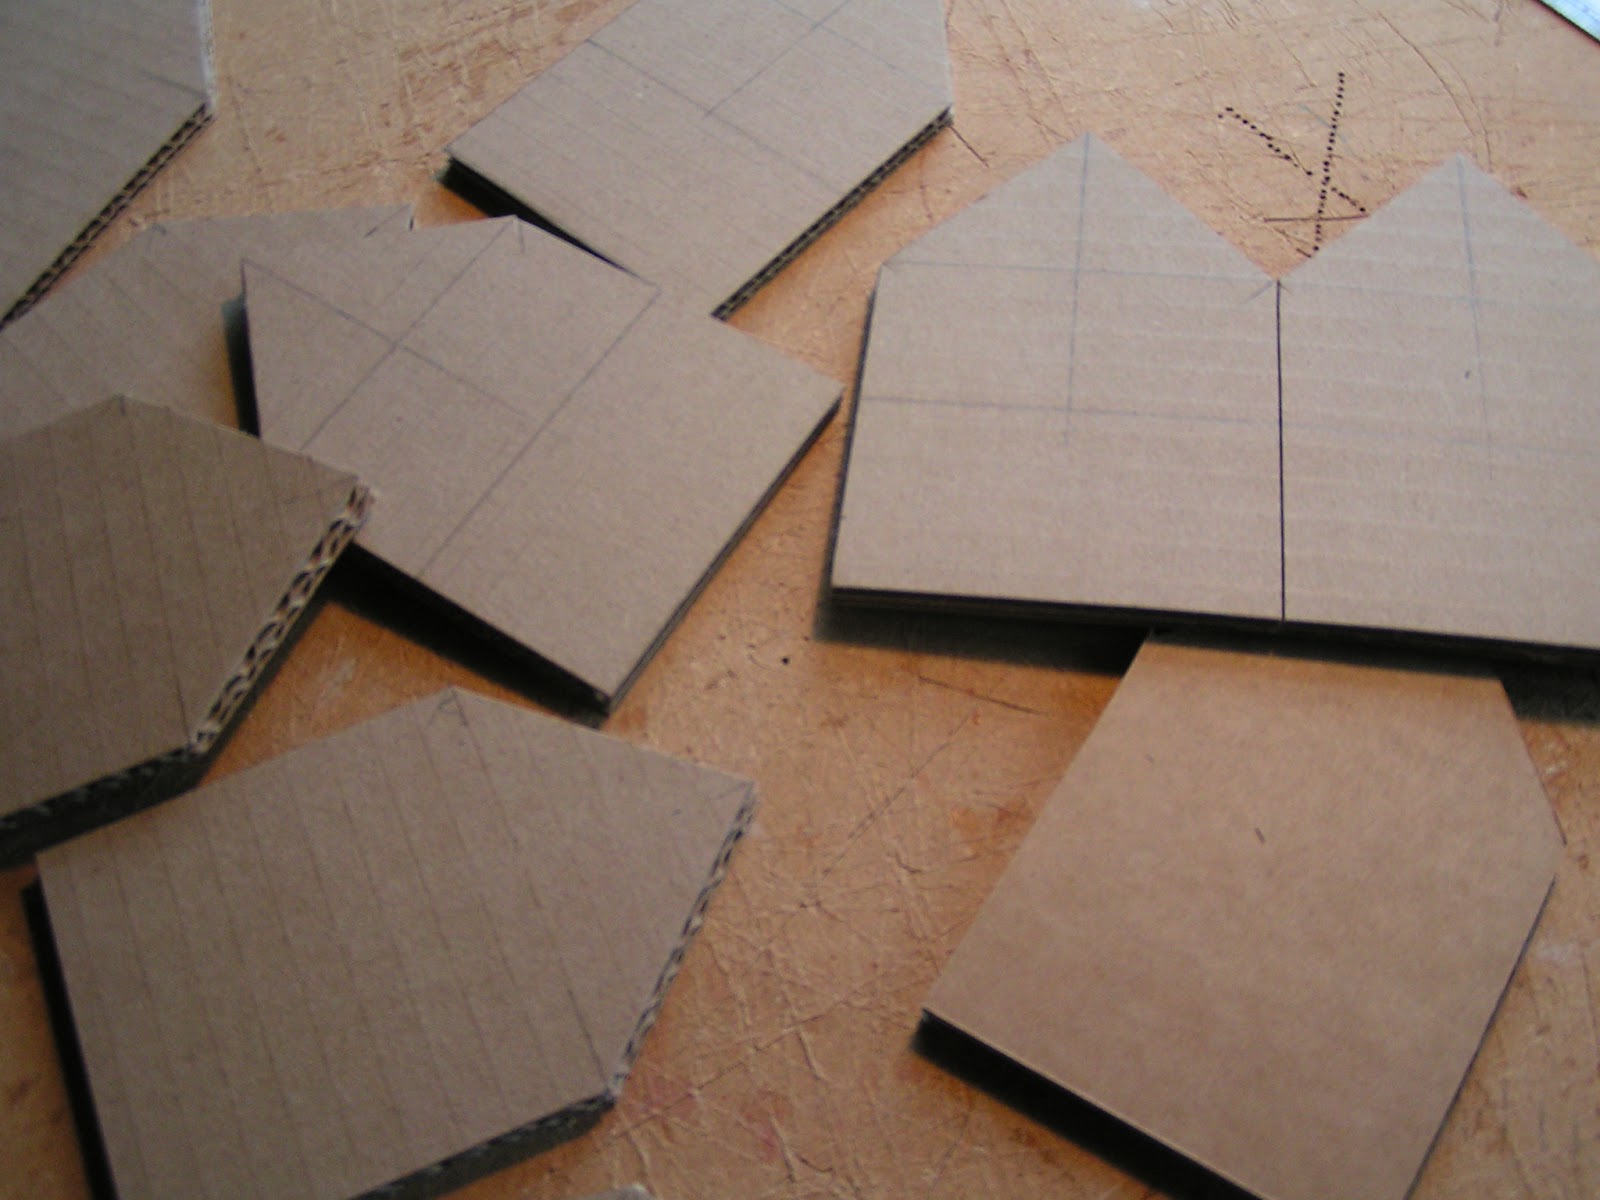

Image Five - And 'scaled out' to build a suitable sized barn.


Image Six - I 'clad' the exposed corrugated cardboard with thinner and smoother card to give a firm base to build upon.


Image Seven - The walls of the kennel/barn were then covered in distressed lollipop sticks. I used superglue to glue the sticks them in place.


Image Eight - The barn at the same stage of construction, this time taken from a different angle.


Image Nine - The doors are a single section of thin balsawood, while the arched door entrance is a single piece of Green Foam. Any gaps were filled with DAS modelling clay.


Image Ten - Detailing began with some balsawood eaves and I have based the barn on an oval of 3mm thick plastic card with the groundwork built up from DAS.


Image Eleven - The wooden clad roof is more Green Foam with additional detailing from cocktail sticks, plastic card and DAS.

I have added some resin barrels to the side. I felt that the model needed something to give an impression of 'scale'.


Image Twelve - I have also added a 'bone' shaped name plate - after all this is a bit of FUN.


Image Thirteen - The main doors have been further detailed with plastic card rivets and a couple of bent wire handles.

The groundwork was further textured with sieved sand applied over uPVA glue.


In part two I will talk you through the painting of this Kennel-Shaped Barn, but for now I hope you enjoyed this piece of complete madness!

Woof!

Tony

Sunday, 27 September 2015

Garden Gnome - part ten


Cecil the Garden Gnome is now finished.

I have also given him three coats of matt varnish in the hope that this will protect the paint when he is placed outdoors.


I am fully aware that this has been a rather unusual series of posts, but one that I have enjoyed.


The Gnome is 35cms tall - from his oversized slippers to the top of his orange cap.


The model Gnome is sold as a Gnome with Broom, but I have painted the broom as a paint brush.

I'm still not sure about those trews!

Tony

Saturday, 26 September 2015

Brockhampton Estate Nr. Bromyard, Herefordshire


Sue and I spent the morning at Brockhampton a National Trust estate near Bromyard, Herefordshire. This was the first time we had visited this particular site and were very impressed with the grounds and the main Manor, particularly the 'close timbered' Gate House that bridges the moat.


The main house has many attractions - one of which was this beautifully built model of a Timber framed house. In the same room was an architect's desk complete with part drawn plans, drawing tools and even some coloured inks. I was particularly interested in a book on Timber Buildings and Construction that I was permitted to look through and even had my photo taken at the desk.....


Tucked around the back of the house is this ruined chapel - which has loads of modelling potential.


On the way back to the carpark, we picked Damsons (there was a very good crop) and later still Sue made Damson Jam, a sample of which I am eating while typing this post.

This was one of the best National Trust visits we have had this year and I would recommend it as a great day out. For further details see this link.

Tony

NOTE;
The following image was posted in response to Paul's comment and gives details of the construction of the gatehouse - when and how it was made.

I hope that this helps.


Thursday, 24 September 2015

Frostgrave Statuary - part three


Yet another statue for Frostgrave.

"I am well aware that it is becoming a bit of an obsession!"

Image Two - A Monster-in-my Pocket Hell Hound and two MDF bases.


Image Three - The two bases glued on top of one another and the Hell Hound glued on top of these.

I have used superglue to glue these pieces together.


Image Four - The base is my usual 3mm thick plastic card with the groundwork built up from DAS modelling clay. I have added some scatter to the base and in this image the whole model has been given an undercoat or primer of uPVA glue.


Image Five - The basecoat was a mix of black, brown and blue. You can see how I have mixed the paints on the model.


Image Six - The main colour is again black, white and blue. The blue helps to give the impression of cold and fits in well with the various Frostgrave illustrations in the rule book.

I have also tried to vein the base by adding thin stripes of both white and blue-grey. In this image the effect is very subtle.


Image Seven - The groundwork, painted in Snakebite and Snakebite/Skull White.

Odd stones have been picked out in grey - highlighter white and I have painted the six eyes with a red wash and a white pin-prick.


Image Eight - Once varnished the base was decorated with dyed sawdust (or railway scatter) and some ground foam.


Image Nine - In this image I have included my tried and trusted Flintloque Rifleorc to give an idea of the size and scale of this statue.

The latest model statue is 80mm tall and fixed to a base 100mm x 100mm.


Tony

By publishing this tutorial I am hoping that I can raise some money for charity. If you have read and enjoyed this short tutorial, I would ask that the next time you pass a charity collection tin or someone in the street collecting that you donate whatever you think fit and remember this article.

Wednesday, 23 September 2015

Statuary for Frostgrave - part two


My latest piece of statuary for the planned game of Frostgrave is this Pillar of Good.

Image two - The main model is a Reaper Bones Pillar of Good (77246) that I picked up as part of a mixed-bag of models at a recent e-bay auction. In truth, I was more interested in the other models and this casting was relegated to my 'spares-box'. Skip forward a month or two and here it is being based and painted in just a couple of days!

I have based the model on a simple button.


Image Three - The model has now been fully based. From top to bottom we have; The Pillar of Good, a couple of spare coins (it is always worth hanging onto old coins as they are great for bases), the button and a rough circle of 3mm thick plastic card, cut and chamfered to shape.

I used superglue for the construction.

The groundwork is DAS modelling clay and some sieved stones and fine sand applied over uPVA glue.


Image Four - The basecoat is black, brown and blue. Try to get a good overall coverage as this will help with subsequent layers of paint.


Image Five - Highlighting with a lighter grey to which I have once again added a small touch of blue.


Image Six - The statue has been 'washed' with various washes, I try to vary the colour and consistency as I find this makes the stonework appear less monotone.

The groundwork has been painted with Snakebite Leather and highlighted with Snakebite and Skull White.


Image Seven - After varnishing with Galleria matt varnish the base has been further detailed with both railway scatter or dyed sawdust and some ground foam.

The Flintloque Rifleorc gives some idea of the size of this latest statue - the new model is 80mm tall and sits on a base 55mm x 55mm.


Tony

By publishing this tutorial I am hoping that I can raise some money for charity. If you have read and enjoyed this short tutorial, I would ask that the next time you pass a charity collection tin or someone in the street collecting that you donate whatever you think fit and remember this article.

Monday, 21 September 2015

Simple Statuary for Frostgrave


You would be hard-pressed not to have seen and read about the phenomenal rise of the latest Osprey publication/game Frostgrave. I have already written a Blog post detailing how I purchased a copy the first week it was launched.

Since then I have been planning how to build my own band of adventurers as well as passing the book around a group of select gaming friends. One such acquaintance and work colleague, Mike has even gone ahead and purchased his own copy.

Mike and I are planning a game very soon and we are both actively searching out suitable miniatures and building Frostgrave inspired terrain. Most of the terrain I have built for Flintloque could work, but even so I have started a couple of new terrain building projects. This simple statue is one such article and I hope that it is of use to others.

Image Two - Searching through my 'spares box' I came across this Monster-in-my-Pocket creature, a winged and eagle headed humanoid. I also pulled out this plastic cake-decorating pillar. A good starting point for some Frostgrave Statuary.....


Image Three - The miniatures was glued to the top of the plastic pillar with superglue and any gaps filled with DAS modelling clay.

The base is an off-cut of 3mm thick plastic card cut into a rough circle with the edges first cut and then sanded to a chamfer.

The simple groundwork is more DAS modelling clay added over a layer of uPVA glue.


Image Four - The groundwork has been further textured with sieved stones and fine sand applied over dilute uPVA glue.


Image Five - The Flintloque Rifleorc gives some idea of the size of this statue. The model is 140mm tall (base of pillar to top of wings) and the base is 70mm x 70mm.

I could have cut the plastic pillar down, but thought that for this 'simple, quick and dirty' tutorial it was much simpler to go ahead with the pillar without any modification.

In this image the model has been primed with uPVA glue to which I have added some very fine sawdust.


Image Six - The painting started with an all-over undercoat of dark brown, mixed with black and further refined with some lighter brown. The paint was applied with a large and soft brush, with the different colours being mixed and blended on the model


Image Seven - The stone colour has been built-up with black, white and blue acrylic paint. Little of the brown is evident!


Image Eight - I have now 'washed' the model with various washes, some bought and others home-made. This helps to define detail and 'blend' the various colours together. I believe that working over a brown base and using blue in the mix fits in better with the superb images in the Frostgrave book.


Image Nine - The base or groundwork has been painted in my usual style and colour mix - Snakebite Leather with Snakebite and Skull White highlighting. I have picked out various odd stones in grey (mixed from black and white, highlighted with more white).


Image Ten - Prior to varnishing with Galleria mat varnish, I gave the whole model one last 'drybrush' with a toned-down white acrylic paint, just a fine dusting to highlight the sculpted detail.


Image Eleven - The finished model to add to my (huge) collection of scratch-built terrain. The flocking is 'railway scatter' or dyed sawdust with odd clumps of ground foam and a couple of static grass tufts glued in place with superglue.


Image Twelve - A different angle.


Image Thirteen - Another image with the Flintloque Rifleorc, hopefully giving an idea of the size and scale of this simple piece of terrain.


The construction took a couple of hours, then after leaving it overnight, the painting was completed today. In total the model took about 3 hours (start-to-finish) to produce and because I was using existing materials, cost nothing - a Win, Win.

I have purposely not added any snow to the model, believing that I can always sprinkle some onto the gaming table later. By not making it permanent, I can also use this model with my Flintloque miniatures and terrain.

Look out for more simple Frostgrave terrain over the next couple of months.

Tony

By publishing this tutorial I am hoping that I can raise some money for charity. If you have read and enjoyed this short tutorial, I would ask that the next time you pass a charity collection tin or someone in the street collecting that you donate whatever you think fit and remember this article.

Garden Gnome - part nine


Tartan trews on a garden gnome! Whatever next?

To be honest, I'm not sure it works and I might over-paint them. But they were fun to paint.


The design was copied from my work jacket - a Golf jacket that once belonged to my Father and the coat I still use when ever I am down the shed following my hobby. I feel that Dad is with me when ever I wear it.


We will see if I re-paint them.....

Tony