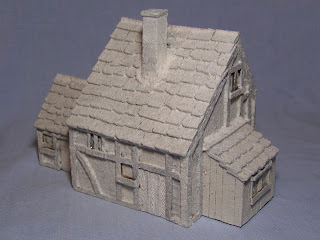
The latest update - the surface texturing. I have used a mixture of uPVA glue, textured paste (artists use it to thicken and add body to acrylic paints), fine sand and ready mixed filler to paint on a protective and textured coating to the model. I find that this texturing gives the model a better surface finish, adding interest to the plain card detail as well as giving the card a stronger and longer lasting surface finish.
I have used a large, soft bristled brush and watered-down the mix with water to which I have added a tiny drop of washing-up liquid. The plain white-washed base also helps with painting.
The next couple of steps will show how this simple card building was painted.
Tony


5 comments:
Can't wait to see how this piece paints up. Thanks for posting all these, they are all getting bookmarked for future inspiration/projects!
Still gorgeous work, Tony.
Very different from your normal work, but I still find them inspiring!
Cheers!
Rob
Do you mix all of those texturing items together and apply, or do you apply different textures to different sections of the building for more variety?
"Do you mix all of those texturing items together and apply, or do you apply different textures to different sections of the building for more variety?"
In this instance, I mix all the ingredients together and then apply the paste. I have in the past and on more detailed models, applied the paste, sand and fillers as separate layers. It depends on the effects I want.
I hope that this helps.
Tony
Yes, thank you.
Post a Comment