Wednesday, 8 April 2020

The Chapel at Rofenburg - part six


The very distinctive roof caused me some ‘head-scratching’. I first cut a rectangle of mounting card to act as the base and then built the roof up in sections. The first roof slope – a shallow roof onto which I added a second roof – a little steeper and finally a third – steeper still to give the distinctive ‘pagoda’ shape.

These first three images show how the three roof shapes were glued on top of one another. The roof was built from mounting card and card from the back of an artists sketch pad. I used superglue, PVA glue and my hot glue gun during construction.


However I was not satisfied with the shape – thinking it looked a little top-heavy and I have added ‘half-hipped’ ends. The next three images show how these were constructed from card and glued in place with my hot-glue gun. The joins have been smoothed out by adding DAS modelling clay applied over PVA glue.


More to follow, but for now stay safe and

Keep Calm and Cary on Modelling

Tony

Tuesday, 7 April 2020

Flintloque Regiment Lowland Dwarves - part five


At long last some paint.....

Image one (above) shows all eight models undercoated in a very dark brown colour which was mixed from Charred Brown (Vallejo) and black. the dark brown was brush painted over a Tamiya grey undercoat/primer 'rattle can'. Not much to see.

Image two (below) I have painted all of the exposed flesh areas over a Snakebite Leather (Games Workshop) base which was highlighted with a Snakebite and white mix. I used a pair of brushes - a Rosemary & Co Sable/synthetic mix brush (401 number 3 long handle) and a GW starter brush (which has a very fine tip). I also used my home-made Wet Palette, something that I have been experimenting with for some time.


Image three (below) is a close-up of just four of the Dwarves to show my preferred method of painting these 'chunky' Alternative Armies figures which allows the dark basecoat to show through in the shadows. I should also point out that the flesh areas have also been lightly 'washed' with the old (blue topped GW) Flesh wash and tidied up with the dark brown mix.


I should be posting more very soon. I hope you like the first colours.

Stay safe

Keep Calm and Carry On Modelling

Tony

Monday, 6 April 2020

The Chapel at Rofenburg - part five


The next step was to add a blue foam step to the front entrance and then model some paving stones modelled from thin wafers of blue foam. I used some off cuts of foam which I keep in a small box specifically for situations like this. The step and paving stones were textured by rolling a rough stone across the surface and then gluing them in place with PVA glue. I have coated the steps and slabs with a mixture of PVA glue, ready mixed filler and white acrylic paint which was applied in a stippling motion with a large stiff brush.

I spread on more DAS modelling clay to further build up the groundwork. The DAS was applied over PVA glue.


There should be more updates soon. But for now Stay Safe

Keep Calm and Carry On Modelling

Tony

Saturday, 4 April 2020

Flintloque Regiment Lowland Dwarves - part four


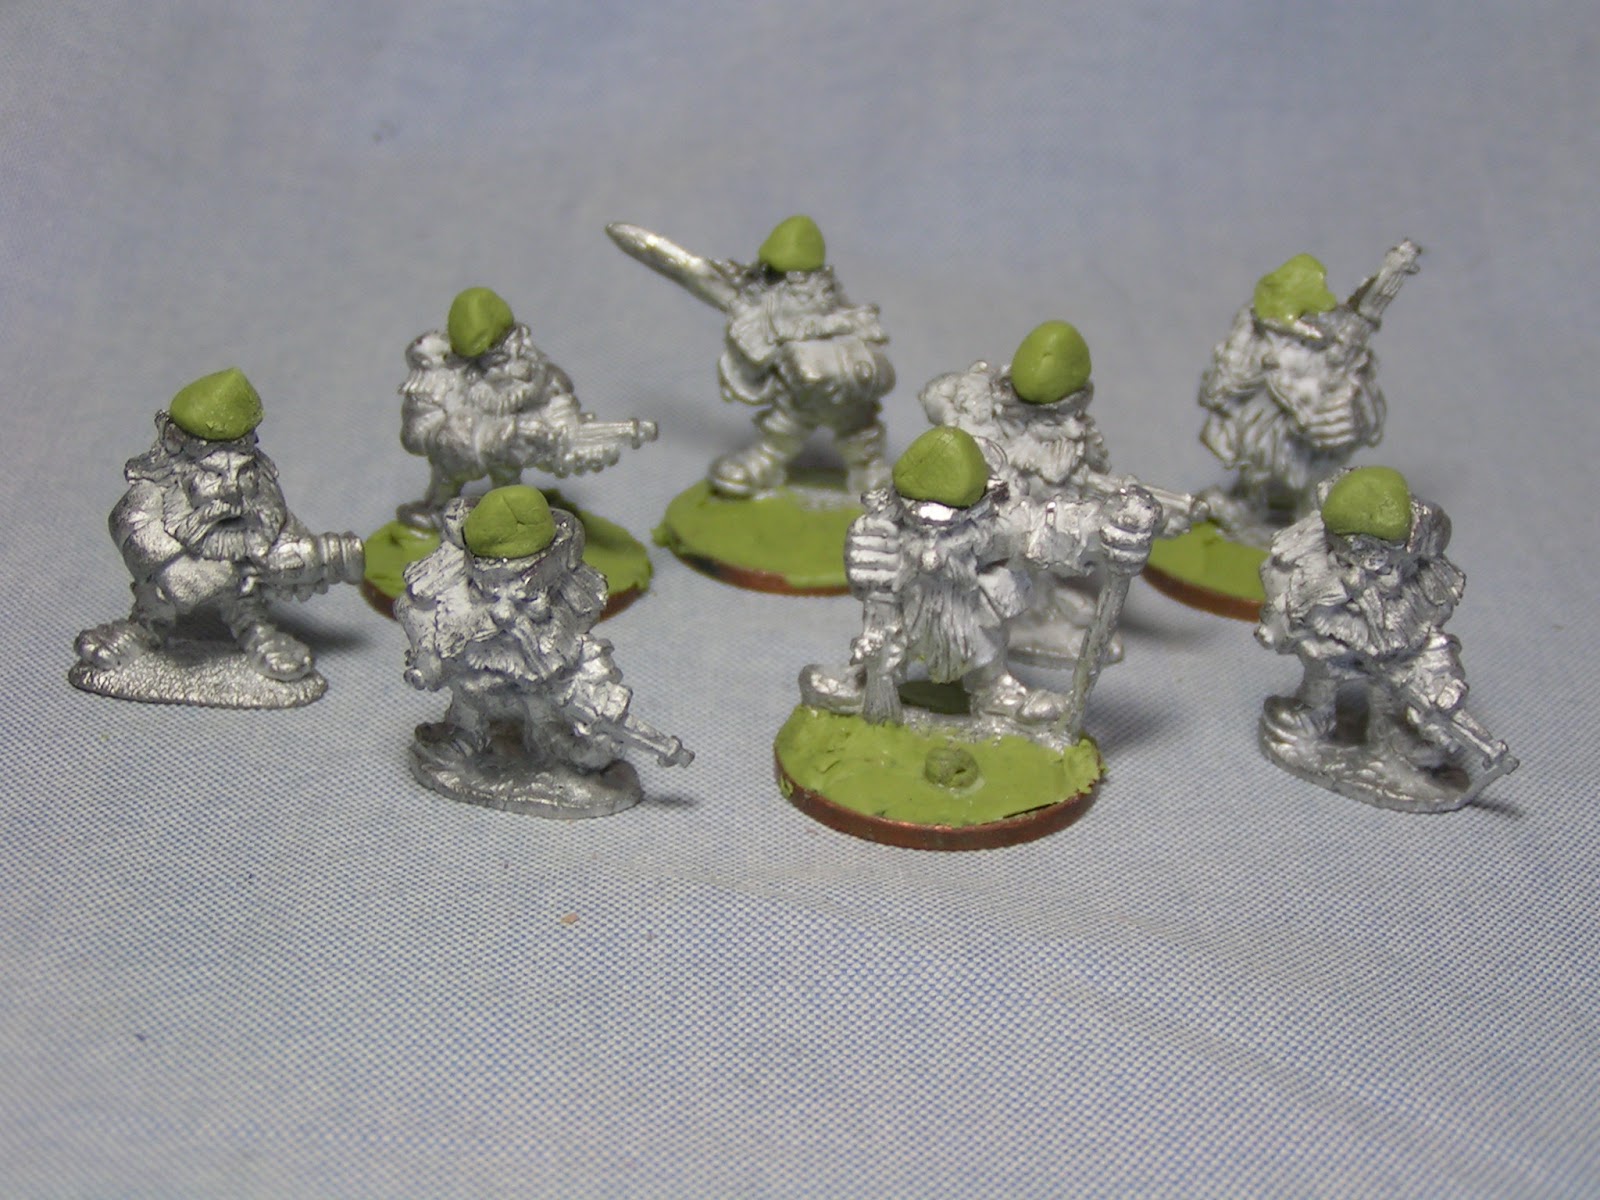
Although it has been some time since the last update, I have been working diligently on these eight Flintloque Dwarves, converting them into a new and unique regiment by copying this image which was found on the internet.

I started by applying a rough blob of Milliput which will act as the basis of the new shako/headgear. This Milliput was added over a small drop of superglue and then hardened in the oven on a low light.


The initial sculpting was carried out with Green Stuff and copying the sketch below.


While the images below show the development.....

As you can see the new headgear took some time to perfect and this is the main reason why this post has taken so long.


All in all the sculpting of the new headgear took about four days with lots of down time waiting for the green stuff to harden (even though I tried speeding it up by placing the miniatures in the oven!)

The detailing was done with sculpting tools, carving back the hardened green stuff and sanding or filing to refine the shape. It took some time.....

The image below shows the group of eight Flintloque Dwarves ready for undercoating. They are based on 2p coins with the groundwork built up from Milliput and detailed with sieved stones and fine sand applied over PVA glue.


It might have been easier to have sculpted one shako in detail and then cast up eight identical copies, but when you are only dealing with eight models, I'm not sure sculpting, mould making and then casting is worth the effort.

There will be more updates soon but in the meantime stay safe

Keep Calm and Carry On Modelling

Tony

Friday, 3 April 2020

National Theatre Live - One Man, Two Guvnors


You Tube are running the live stage play - One Man, Two Guvnors staring James Corden for a limited time only. Do yourself a favour and settle back to watch this fantastic comedy farce. Filmed live on stage. For details see this link.

Stay safe.

Tony

Thursday, 2 April 2020

The Chapel at Rofenburg - part four


The simple chapel building was glued to a piece of 3mm thick plastic card which had been cut into a rough oval and had the edges chamfered and smoothed. I used DAS modelling clay (applied over PVA glue) to 'bed' the building into the groundwork and added a step to the front from a piece of thin blue foam.

I had also sanded the walls again and although it is difficult to see in these images, I have glued the chapel to the base with a 3mm spacer in between the base of the chapel and the plastic card base. I find that this helps with the 'bedding in' process and stops the building looking like it has been just placed or 'plonked' on to on the base/groundwork.


One other point of note is that when applying DAS to a plastic card base I find it prudent to first 'score' the surface of the plastic card. I believe that this helps the DAS to adhere to the smooth plastic card but as I do this on most of my buildings and usually apply some PVA glue as well - I'm not sure if this process is necessary. However I would still recommend both scoring and PVA glue to anyone attempting to build wargame terrain and following these techniques.

Once again stay safe.

Keep Calm and Carry On Modelling

Tony

Wednesday, 1 April 2020

DAS Modelling Clay - update


Following this Blog post, I was asked "how do you store your opened packs of DAS?"

I tend to use two methods;

The first is using these zip-lock bags (this example is from IKEA but similar bags are available from most supermarkets. I suggest you look out for the double seal bags with two sealing strips across the top as I find these are better).

The second method is a little old school, just a bulldog clip or clamp to keep the opened pack sealed shut.


I hope that this helps.

Keep safe.

Keep Calm and Carry On Modelling

Tony